
You know that feeling when you walk into someone’s home in December and it just feels… perfect? Like they’ve got this effortless winter wonderland thing going on, and you’re standing there wondering how they made it look so put-together without spending their entire paycheck at Pottery Barn?
Well, plot twist – it’s probably garlands. A good garland can transform any space from “I live here” to “I live here and I have my life together,” and that’s the kind of energy we all need more of.
But here’s where it gets tricky. Every time I used to think about making garlands, my brain would immediately go to that intimidating sewing route. You know, the one where you need actual skills and patience and the ability to make things look symmetrical? Yeah, that was never going to work for someone who once tried to hem a pair of jeans and ended up with what looked like I’d attacked them with safety scissors in the dark.
Growing up, I watched my mom and aunties create these gorgeous seasonal decorations, and there was always this assumption that “real” crafting meant pulling out the sewing machine. My grandma could whip up anything with just a needle and thread, but somewhere along the way, I convinced myself that if I couldn’t sew, I couldn’t make beautiful things for my home.
That mindset kept me buying overpriced decorations that would fall apart by January, or worse, attempting those Pinterest-perfect projects that left me frustrated and surrounded by craft supplies I’d never use again. I was stuck in this cycle of either spending too much money or feeling like a crafting failure.
Then last winter happened, and everything changed. I was staring at this sad, bare mantel thinking about how much I wanted that cozy, decorated feeling in my home, when I had this lightbulb moment: what if the whole sewing thing was just… optional? What if there were ways to create those same beautiful, lasting garlands without ever touching a needle?
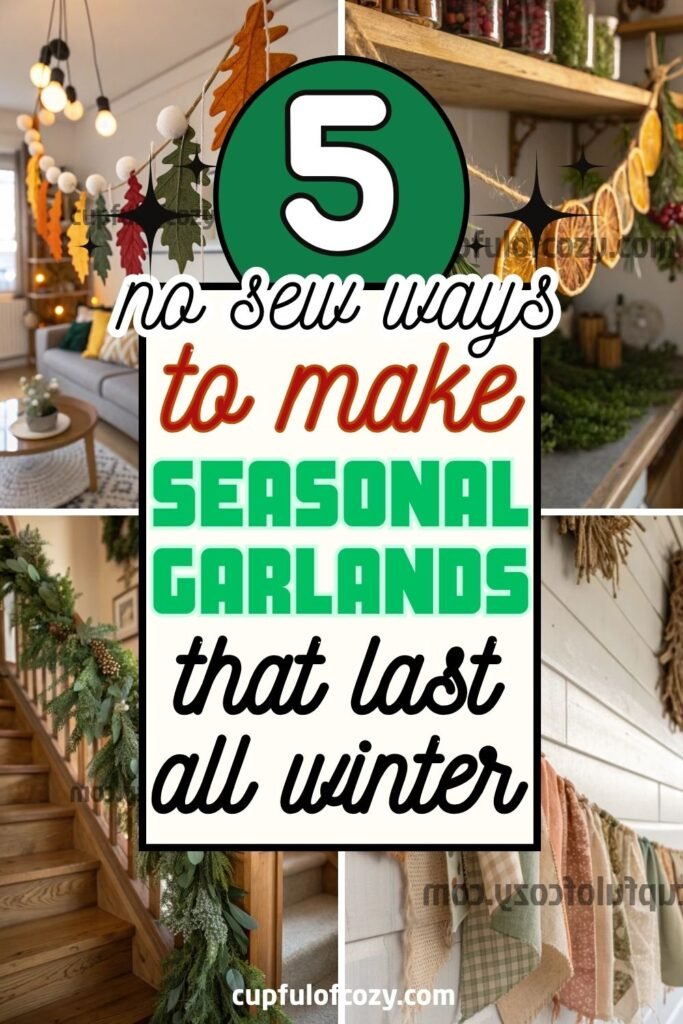
Turns out, there are so many ways. And not just “good enough” ways – I’m talking about methods that create garlands just as gorgeous as anything you’d see in those fancy home magazines, but without the stress, the steep learning curve, or the inevitable pricked fingers.
Why This Winter Decorating Game-Changer Matters More Than You Think

Look, I get it. In the grand scheme of life, garlands might seem like a pretty low priority. But here’s what I’ve learned: the way we decorate our spaces during the long winter months isn’t just about looking pretty – it’s about creating an environment that actually supports our mood and wellbeing when everything outside is gray and cold.
Having handmade decorations in your space hits different than store-bought stuff. Maybe it’s because every time you look at them, you remember the satisfaction of creating something with your own hands. Or maybe it’s because they reflect your actual style instead of whatever was trending at Target that season.
But the real game-changer? These no-sew methods mean you can actually enjoy the process instead of dreading it. When making decorations becomes something you look forward to instead of a chore you’re bad at, you’re way more likely to actually do it. And that means your home gets to feel festive and cozy all winter long, not just for the two weeks when you finally work up the motivation to tackle a complicated project.
Can we talk about the money factor for a second? Quality winter garlands at stores can easily cost $30-50 each, and that’s for basic ones. When you know how to make them yourself using materials you probably already have, you can decorate your entire space for the cost of one store-bought garland. That’s money that can go toward other things – like those cozy winter candles or a nice bottle of wine to enjoy while you’re crafting.
The Winter Decorating Mistakes That Keep Your Home Looking Bland
Here’s what nobody talks about when it comes to winter decorating: most of us are sabotaging ourselves without even realizing it. We get so focused on complicated techniques or expensive materials that we end up with nothing at all, or worse, decorations that look like we tried too hard and missed the mark.
- Before you hit “buy” on your next decor order, there’s a free 10-second step you should never skip: checking Rakuten (Ebates). I simply find the store name, click the deal, and shop like normal, and Rakuten sends me real cashback! Prices keep climbing everywhere, but this is one way to get a little back on the things you were going to purchase anyway. New members even get a $30 bonus when they spend $30 — which means your first order could pay you back instantly. Don’t miss out again. Click here to sign up and save money!
*Disclosure: This post includes affiliate links. I may earn a small commission if you join Rakuten through my link — but it doesn’t cost you anything extra. In fact, you’ll actually save more!
The biggest mistake I see people make? Thinking that handmade has to mean time-consuming and difficult. We’ve somehow convinced ourselves that if something doesn’t require advanced skills or hours of work, it can’t possibly look good. But that’s just not true. Some of the most beautiful garlands I’ve ever made took me less than an hour and required zero special talents.
Another thing people don’t consider is seasonal longevity. You’ll spend all this time and money creating something gorgeous for December, only to watch it fall apart or look sad by mid-January. Meanwhile, you could be enjoying beautiful decorations that actually last through the entire winter season with just a little planning in your material choices.
And can we talk about the fear of imperfection? I used to avoid making anything because I was worried it wouldn’t look “professional” enough. Here’s what I’ve learned: handmade charm is actually better than mass-produced perfection. Those little irregularities and personal touches are what make your decorations feel warm and authentic instead of sterile and generic.
What we also ignore is how much our decorating confidence affects our overall enjoyment of the season. When you’re constantly looking at your bare walls and feeling bad about not having the skills or time to create something beautiful, it actually impacts your mood more than you’d think. Learning a few simple, no-fail techniques changes that whole dynamic.
Girl, let me tell you about the game-changer that happened in my living room last December. I was standing there with a needle in one hand and thread in the other, trying to make this “simple” garland I saw on Pinterest, and I wanted to throw the whole project out the window. My grandma always said I got her stubborn streak but definitely not her sewing skills, and she was right about that one.
That’s when it hit me – why am I torturing myself with a needle when there are literally a million ways to make gorgeous garlands without sewing a single stitch? And bonus points: these babies actually last through the entire winter season instead of falling apart after two weeks like my sad attempts usually do.
The Fabric Scrap Method That Changed Everything
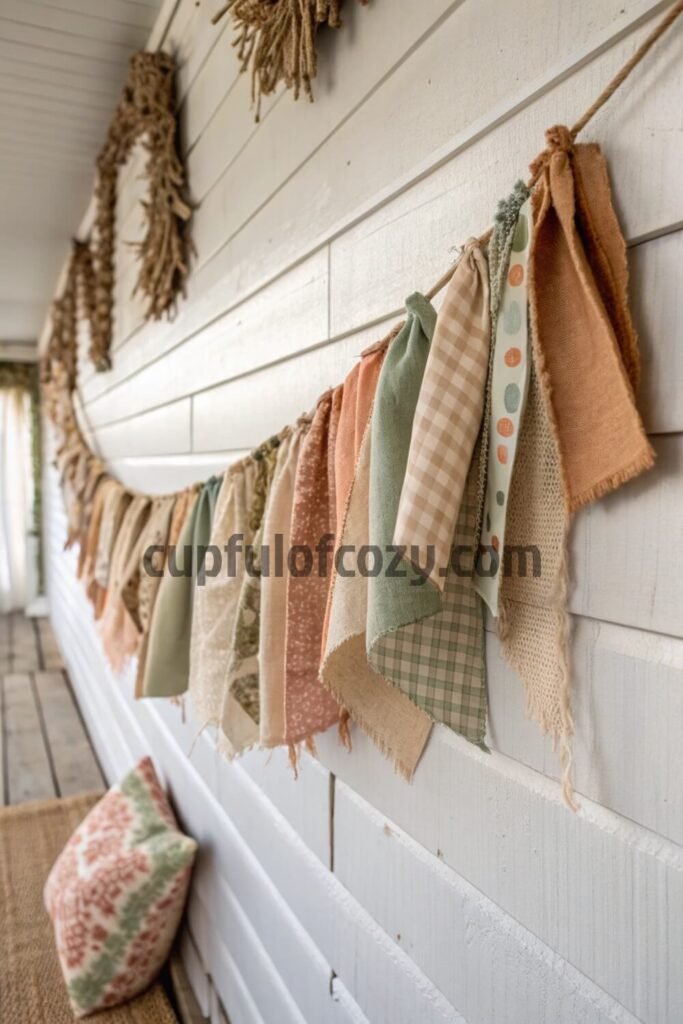
So here’s what I discovered when I was digging through my craft bin (you know, that random box we all have stuffed somewhere): those fabric scraps I’d been hoarding for “someday” were actually perfect for this. I’m talking about that burlap from last year’s fall project, those felt pieces from when I thought I’d become crafty, even that drop cloth from when we painted the bathroom.
When I first looked at this pile of random fabric pieces, it reminded me of my aunt’s sewing room – she’d save every single scrap “just in case,” and we used to tease her about it. Turns out she was onto something all along. These mismatched pieces actually create the most interesting, layered look when you combine them.
The trick is cutting them into shapes – and I mean any shapes you want. Circles, leaves, weird abstract blobs that somehow look intentional. I made myself a paper template because eyeballing it was not working for this perfectionist brain of mine. Then you just glue those pieces right onto some twine with fabric glue, or if you’re feeling fancy, tie them on with little knots.
What gets me excited about this method is that it looks expensive and intentional, but it’s literally made from stuff I already had lying around. My cousin came over and asked where I bought it, and when I told her I made it from scraps, she made me promise to teach her the next weekend.
When Nature Does Half the Work for You
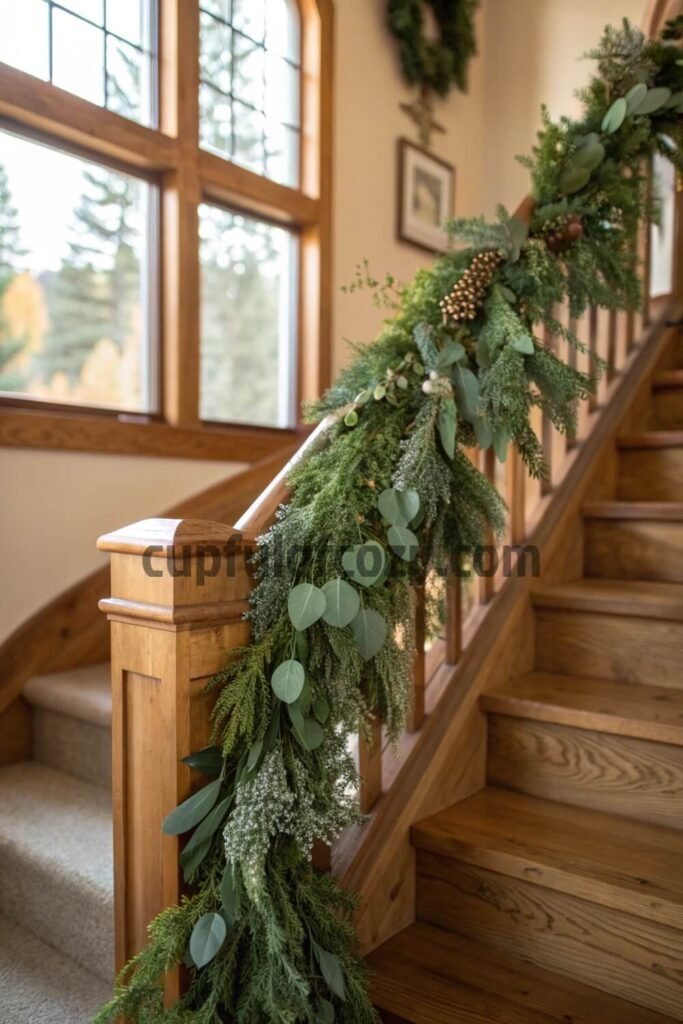
Now, if you want to go the route that makes your whole house smell like a winter forest, let’s talk about using actual greenery. I learned this one from watching my neighbor prep for her holiday party – she was out there with floristry wire, attaching eucalyptus and pine branches to this long piece of twine like she was some kind of garland wizard.
Watching her work reminded me of my mom arranging flowers when I was little – she had this way of making everything look effortless even though I know now it takes practice. But that’s the beautiful thing about greenery garlands: even if your technique isn’t perfect, nature does most of the heavy lifting for you.
The secret is cutting everything into short sections and overlapping them as you wire them on. It creates this full, lush look that rivals anything you’d pay big money for at those fancy home stores. If you keep it out of direct sunlight and give it a little mist every few days, this thing will stay fresh for weeks. I’m talking 4-6 weeks if you treat it right.
I hung mine along the staircase banister, and every time someone walked by, they’d catch this amazing woodsy scent. It was like having a piece of the mountains right in my hallway. My friend said it reminded her of her childhood Christmas tree farm visits, and honestly, that’s exactly the vibe I was going for.
The Paper Trick That Fooled Everyone
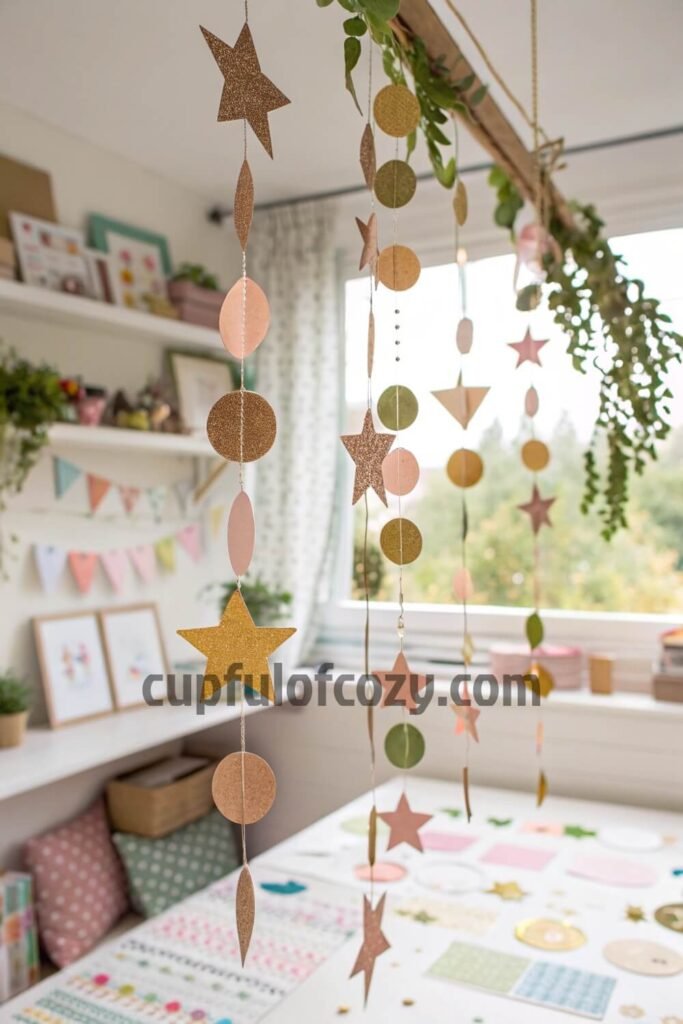
Here’s where I got really creative – and maybe a little obsessed. I found these metallic papers at the craft store that were on clearance (because apparently I can’t resist a good deal), and I started punching shapes out of them with those big craft punches. Stars, circles, leaves – whatever mood I was in that day.
The first time I saw those craft punches, I thought they were the most ridiculous thing ever. Like, who needs a tool just to make perfect circles? But now I’m completely converted. There’s something so satisfying about that clean “thunk” when you punch through the paper, and suddenly you have these perfectly shaped pieces that would take me forever to cut by hand.
Threading them onto yarn is incredibly relaxing, and this garland weighs practically nothing, so you can hang it anywhere without worrying about it pulling down your decorations or damaging walls. I mixed metallic with some solid colors and a few patterned papers I had leftover from scrapbooking, and it turned out way more sophisticated than I expected.
My little niece helped me make one for her room, and she was so proud showing it off to everyone who visited. Sometimes the simplest projects end up being the most meaningful, you know?
The Felt Leaf Game-Changer

This one is for when you want something that’ll last through multiple seasons because felt doesn’t mess around – it’s durable and doesn’t fray like other fabrics. I cut leaf shapes by hand at first, but then my sister convinced me to borrow her Cricut, and let me just say… that thing is dangerous. I went a little overboard and made enough felt leaves to decorate a small forest.
My mom used to say that felt was the most forgiving fabric for beginners because it doesn’t have a grain and it doesn’t unravel. She was teaching me to make Christmas ornaments when I was about eight, and I remember being amazed that I could cut it with regular scissors and it wouldn’t fall apart. That same principle makes it perfect for garlands.
You can thread them right onto string, or if threading isn’t your thing, just glue them on. What I love is mixing them with other stuff – I added some pom-poms for a winter vibe, and my friend added wooden beads to hers for this really earthy, boho look.
Best part about felt is that you can literally throw this garland in a box at the end of the season and pull it out next year looking exactly the same. No wilting, no fading, just ready to go again.
The Kitchen Raid That Became Art
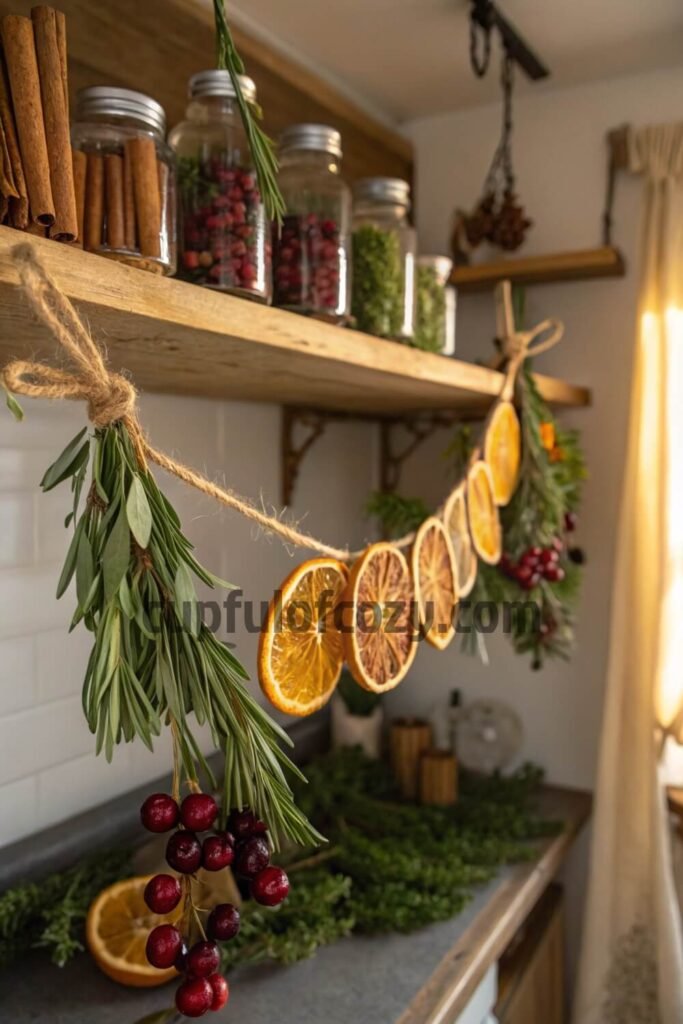
This last idea came to me during one of those late-night scrolling sessions when I couldn’t sleep. I was looking at all these fancy dried fruit garlands online when I realized I had everything I needed in my own kitchen. Oranges that were getting a little too soft, some cranberries in the freezer, and that cinnamon stick collection I somehow accumulated.
The smell of oranges dehydrating in the oven instantly took me back to my childhood – my grandma used to dry orange peels for potpourri, and the whole house would smell like Christmas morning. I never understood why she saved those peels until I started making my own dried fruit decorations.
I spent a Sunday afternoon dehydrating orange slices in the oven (pro tip: crack the oven door open or your house will smell like you’re cooking citrus soup), and then just strung everything together with regular twine. The whole thing smells incredible – like Christmas morning and apple cider had a baby.
My friend suggested spraying it with clear polyurethane to make it last longer, and that was genius advice. It’s been hanging in my kitchen for months now, and it still looks and smells wonderful.
Making These Actually Last Through Winter
Here’s what I wish someone had told me from the start: where you put these garlands matters way more than you’d think. That gorgeous greenery garland I was so proud of? I hung it right next to the window where the afternoon sun hits, and it went from lush to crispy in about a week. Learn from my mistakes, people.
Keep anything with real greenery away from direct sunlight, and give it a little spritz with water every few days. It’s like having a very low-maintenance plant that happens to be festive.
For the fabric and felt ones, just make sure you’re using materials that won’t fall apart on you. Nobody wants a garland that starts shedding everywhere after a few weeks. And when the season’s over, store everything in a cool, dry place – I use those under-bed storage boxes, and they work perfectly.
What I’ve come to love about these no-sew garlands is they’ve completely changed how I think about decorating. Instead of stressing about perfect stitches or complicated techniques, I get to focus on the fun part – choosing colors, mixing textures, and creating something that actually reflects my style instead of just following someone else’s pattern.
There’s something really satisfying about making something beautiful with your hands, even when those hands aren’t particularly skilled with traditional crafting tools. These projects prove that you don’t need to be Martha Stewart to create something gorgeous for your home. You just need a little creativity and the willingness to experiment.
Once you make your first no-sew garland and see how incredible it looks hanging in your space, you’ll never go back to fighting with needles and thread again.
Personal FAQ Section
Q: Okay, but seriously – will these actually look as good as the expensive store-bought ones?
A: Girl, I’m not going to lie to you – they’ll look different, but in the best way. Store-bought garlands have that perfect, uniform look that screams “I came from a factory.” The ones you make will have character and warmth that you literally cannot buy. My sister-in-law saw my dried fruit garland and asked where I got it, and when I told her I made it, she was genuinely shocked. Choose your materials thoughtfully and don’t rush the process – that’s all you need.
Q: How long does it actually take to make one of these? I’m picturing myself spending my entire weekend on this.
A: The fabric scrap and paper ones? Maybe an hour tops, including prep time. The greenery garlands take a bit longer – maybe 2 hours if you’re being really thorough – but most of that is just the meditative process of wiring things on while you catch up on a podcast. The dried fruit one is mostly just waiting time while things dehydrate. None of these are weekend-killers, I promise.
Q: What if I mess it up? I have a track record with craft projects…
A: Here’s the beautiful thing about garlands – they’re supposed to look organic and natural, which means there’s really no “wrong” way to do them. If your spacing is uneven or your shapes aren’t perfect, it just adds to the handmade charm. I’ve never seen a garland that was “ruined” by being imperfect. The worst that happens is you untie something and adjust it. No big deal.
Q: Will the greenery ones really last that long? Because I’ve killed every plant I’ve ever owned.
A: The greenery garlands aren’t like keeping plants alive – you’re not trying to grow anything, just preserve what’s already there. Think of it more like keeping cut flowers fresh. A little mist every few days and keeping them away from heat sources is literally all you need to do. Even if they only last 3-4 weeks instead of 6, that’s still way longer than any store-bought garland I’ve ever had, and they smell incredible the whole time.
Related posts:
12 Rustic Farmhouse Halloween Gnome Door Hangers Kids Can Help Paint & Assemble to Welcome Trick...
9 Fall Garland On Curtain Rod Ideas That Won’t Shed or Tangle And Instantly Cozy Up the Space
12 Pumpkin Spice & Everything Nice Coffee Bar for Spooky-cute Halloween Celebration
How to Make Your Small Porch Look Grand for the Holidays
- Before buying anything online, check Rakuten (formerly Ebates) — either with the browser extension or directly on Rakuten.com. Just type in your store, click the current deal, and shop as usual. Every purchase earns you cashback that can be mailed to you or sent via PayPal. In today’s economy, even a few dollars back can turn into a Starbucks latte, McDonald’s fries for the kids, or a little treat you don’t have to budget for. If you’ve never used Rakuten before, you’re missing out on free money — and right now, you’ll even get a $30 bonus when you spend your first $30. Click here to sign up and stop letting your online orders steal from you. Click here to sign up and save money!
*Disclosure: This post includes affiliate links. I may earn a small commission if you join Rakuten through my link — but it doesn’t cost you anything extra. In fact, you’ll actually save more!