So here I am, scrolling through Instagram at 10 PM on a Tuesday, and every single person I know has already posted their gorgeous fall porch displays. You know that feeling when everyone seems to have their life together except you? That was me last week, standing on my front steps with a single sad pumpkin from the grocery store, wondering how everyone else makes it look so effortless.
My mom always used to say that comparison is the thief of joy, but wow, social media really tests that theory during decorating season. I remember calling her after seeing my neighbor’s incredible setup and asking if she thought I was just bad at this whole homeowner thing. She laughed and reminded me about the time she threw together our entire Thanksgiving table in thirty minutes because she forgot people were coming over, and it ended up being one of our most memorable holidays.
That conversation got me thinking about all the times I’ve created something beautiful under pressure. Like when my sister was getting married and I had exactly two hours to pull together centerpieces for the rehearsal dinner, or when I moved into my first apartment and had friends coming over before I’d even unpacked my kitchen. Some of my favorite decorating wins have happened when I stopped overthinking and just worked with what I had.
The thing about fall decorating is that it doesn’t have to be this massive production that starts in September. I’ve learned that the best seasonal displays often come from those last-minute moments when you’re working with whatever you can find at the farmer’s market or hardware store. There’s something wonderful about the creative problem-solving that happens when you’re not trying to execute some perfect Pinterest vision.
After years of both epic decorating fails and surprising successes, I’ve figured out what actually works when you need to create a beautiful fall entrance without spending weeks planning. These aren’t the tips you’ll find in fancy home magazines, they’re the real-world tricks I’ve picked up from trial and error, conversations with neighbors, and those happy accidents that turn into traditions.
What gets me excited about these particular tips is that they’re all about mixing three simple elements that you can find almost anywhere: pumpkins, cornstalks, and hay. No special ordering, no hunting down rare gourds, no complicated DIY projects that require power tools. Just good old-fashioned fall staples arranged in ways that actually make sense and look intentional.
I’ve tested every single one of these ideas either on my own front porch or helped friends implement them on theirs. Some came from watching what worked in my neighborhood, others from those moments when I was frantically trying to put something together before a gathering. A few were inspired by displays I’ve seen traveling, or from chatting with vendors at farmer’s markets who’ve been doing this way longer than any of us.
Here’s what I’ve discovered: the secret isn’t having the most expensive decorations or starting months in advance. It’s about understanding how these three elements work together to create that cozy, welcoming atmosphere that makes people slow down when they walk past your house. When you get the combination right, it feels like autumn just naturally decided to set up shop at your front door.
Table of Contents
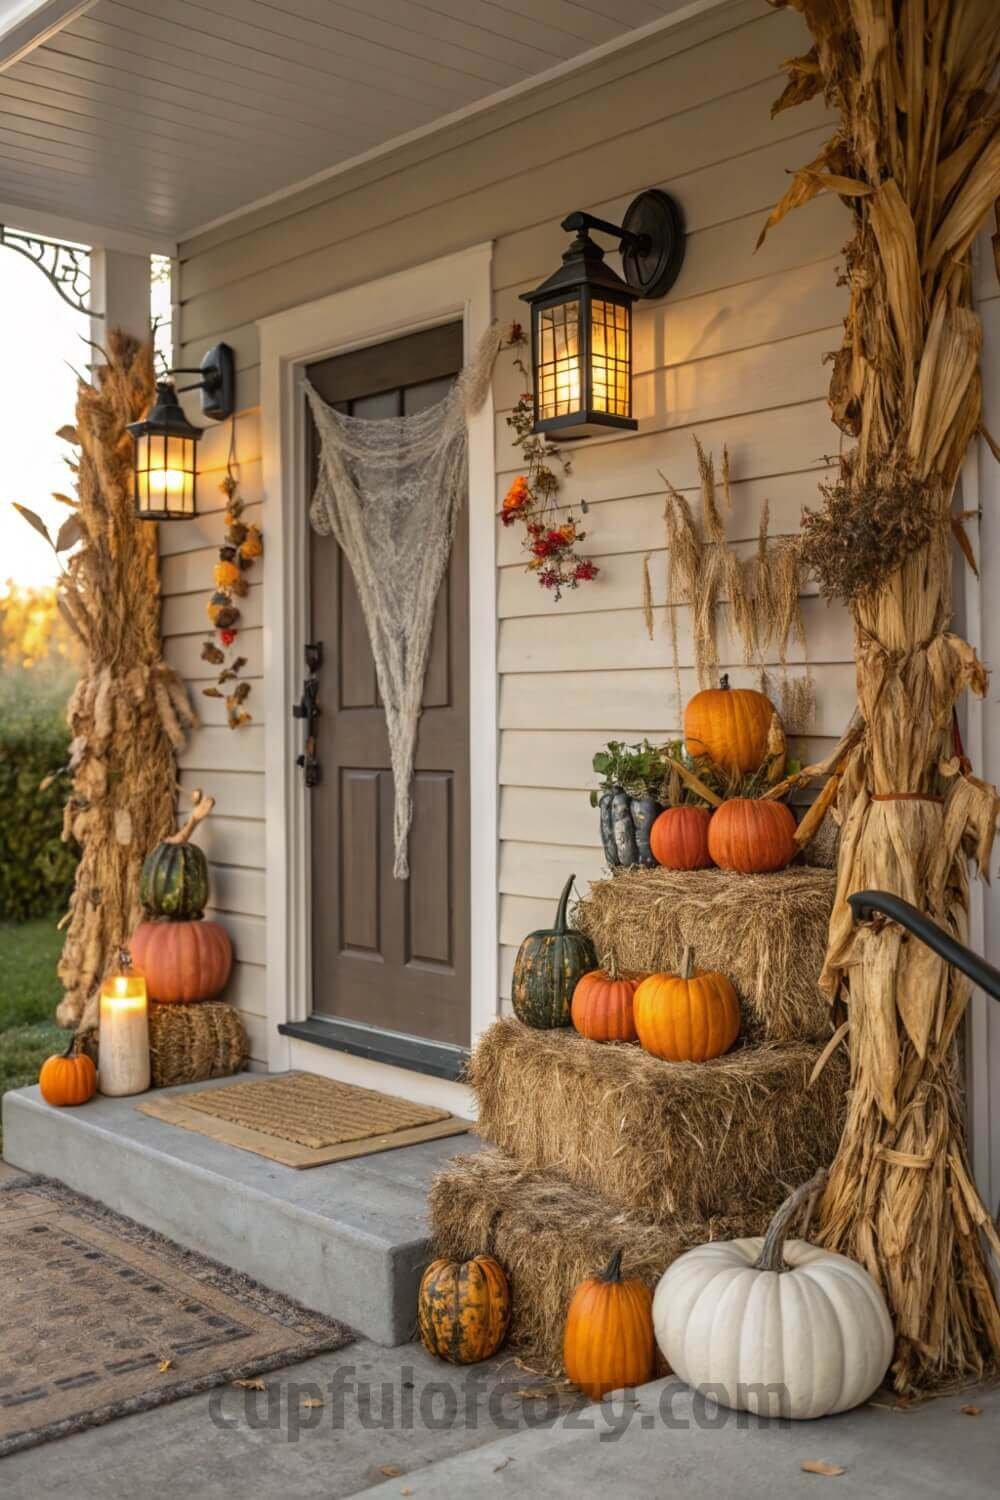
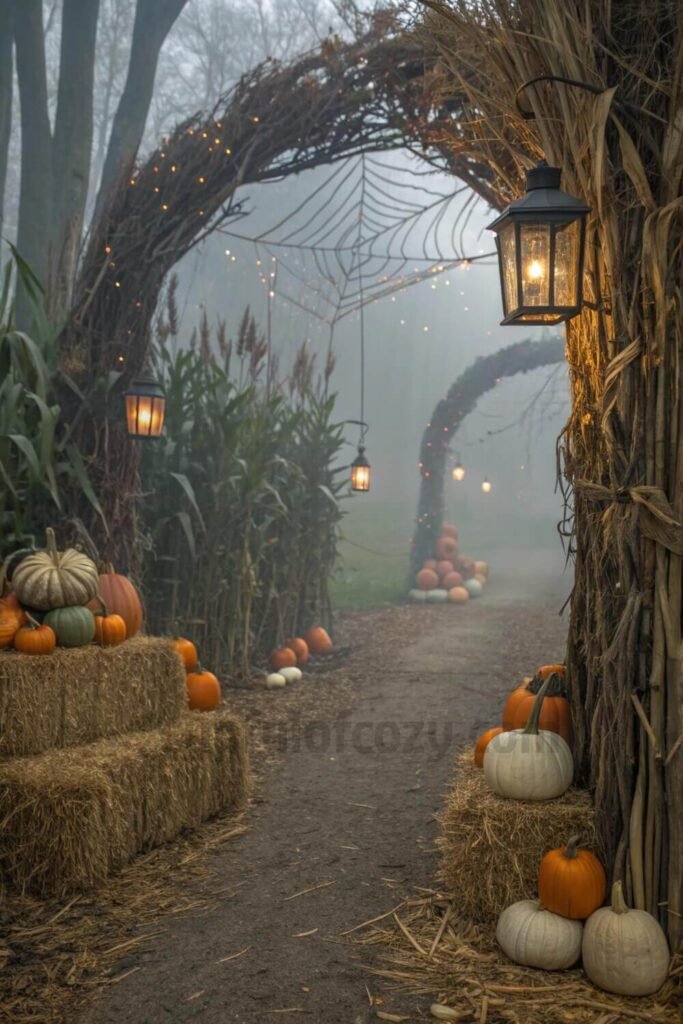
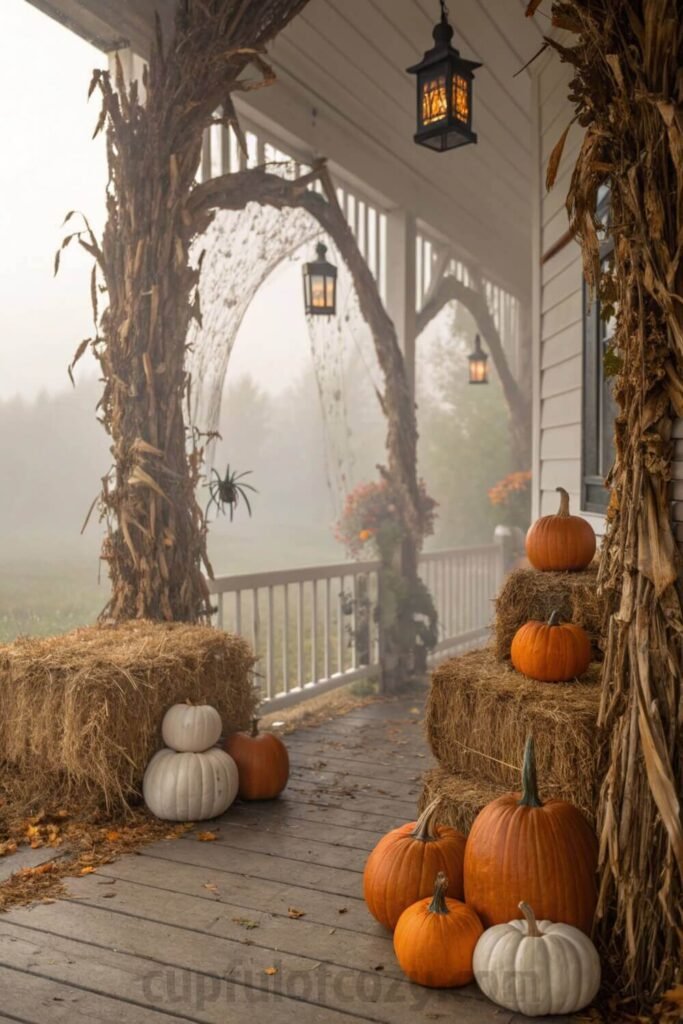
1. Frame Your Entrance with Tall Cornstalks
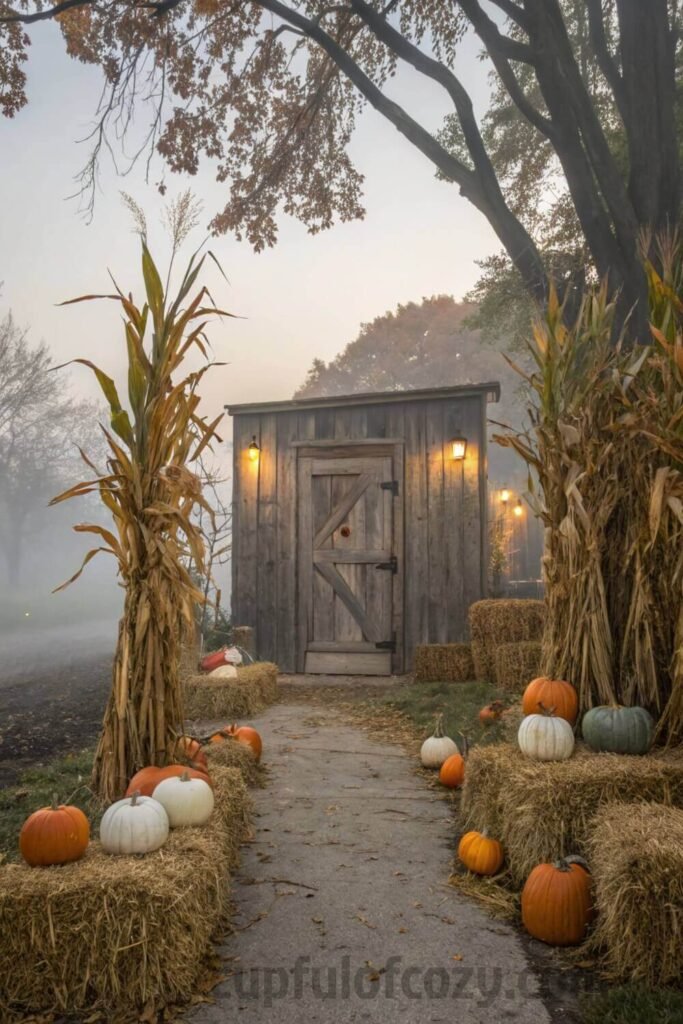
I discovered this completely by accident when I bought way too many cornstalks at the farmer’s market because I got distracted talking to this sweet elderly vendor about her grandkids. Instead of trying to figure out what to do with all of them, I just bunched them up on either side of my front door like some kind of harvest bodyguards.
The height instantly made everything look intentional and dramatic. It’s like putting on the right earrings, suddenly the whole outfit makes sense. Bundle them with twine or those brown zip ties nobody can see, and you’ve got structure that makes everything else you add look purposeful instead of random.
What I love about this approach is how it creates natural boundaries for your display. The cornstalks become these tall sentries that frame whatever you put between them, making even a simple arrangement look thoughtfully planned.
2. Turn Hay Bales into Pumpkin Platforms
- Before you hit “buy” on your next decor order, there’s a free 10-second step you should never skip: checking Rakuten (Ebates). I simply find the store name, click the deal, and shop like normal, and Rakuten sends me real cashback! Prices keep climbing everywhere, but this is one way to get a little back on the things you were going to purchase anyway. New members even get a $30 bonus when they spend $30 — which means your first order could pay you back instantly. Don’t miss out again. Click here to sign up and save money!
*Disclosure: This post includes affiliate links. I may earn a small commission if you join Rakuten through my link — but it doesn’t cost you anything extra. In fact, you’ll actually save more!
My cousin showed me this one when she was going through her Pinterest phase (we all had one, don’t lie). Hay bales aren’t just decoration, they’re like nature’s risers for your pumpkin collection. Stack different sized pumpkins on top, and suddenly you’ve got levels and visual interest without having to figure out complicated arrangements.
Here’s what makes this genius: if you mess up, just rearrange. It’s not rocket science, and the hay bales give you that instant farmhouse vibe that makes people think you’ve got your life together. I usually grab mine from the hardware store for like $5 each, and they last the whole season.
The texture contrast between the rough hay and smooth pumpkins creates this really satisfying visual that photographs beautifully too. Plus, hay bales are practically indestructible, so you don’t have to worry about weather ruining your setup.
3. Mix Up Your Pumpkin Game
This might sound obvious, but I see so many people stick with just orange pumpkins and call it a day. Mixing colors is where things get interesting though. I learned this from my aunt who always has the most stunning fall displays, she goes for the white Cinderella pumpkins, those weird green ones that look like they’re from another planet, and the classic orange ones all together.
The variety makes it look like you actually know what you’re doing with design, even if you’re just winging it like the rest of us. The white ones catch light differently and create this really pretty contrast against all the warm autumn colors.
What surprised me was how much the different shapes and sizes matter too. Those tall white pumpkins next to squat orange ones create this wonderful rhythm that keeps your eye moving around the display instead of just landing on one focal point.
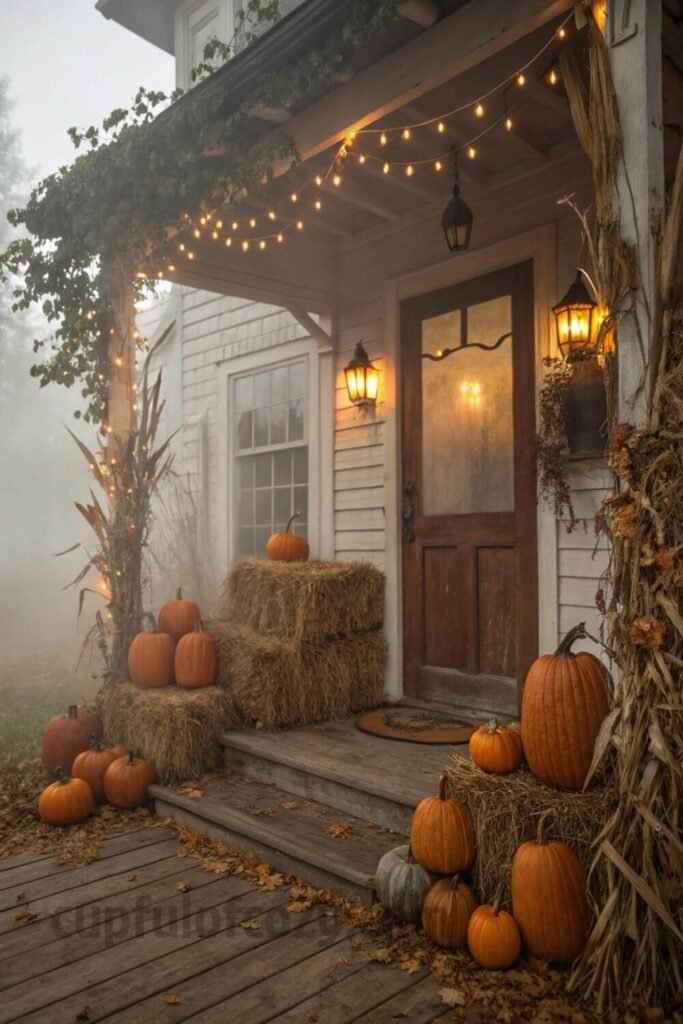
4. Fill the Gaps with Mini Pumpkins
You know that awkward moment when your display looks good from far away but up close there are all these weird empty spaces? Mini pumpkins and gourds are your best friends here. I scatter them around like confetti, some rolling off the hay bales, others tucked into corners where the cornstalks meet the ground.
It’s like when you’re getting dressed and add a necklace, suddenly everything looks complete. These little guys make your whole setup look abundant and natural instead of sparse and planned.
My grandmother used to do this with her garden, filling in bare spots with whatever small plants she had on hand. Same principle applies here, those tiny pumpkins make everything feel full and generous.
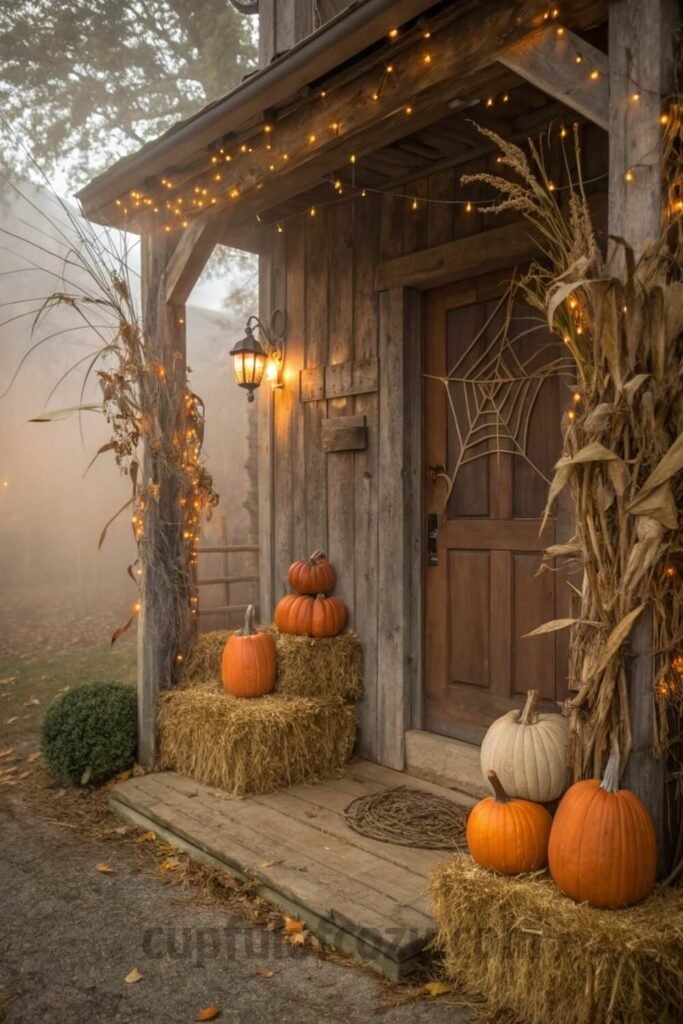
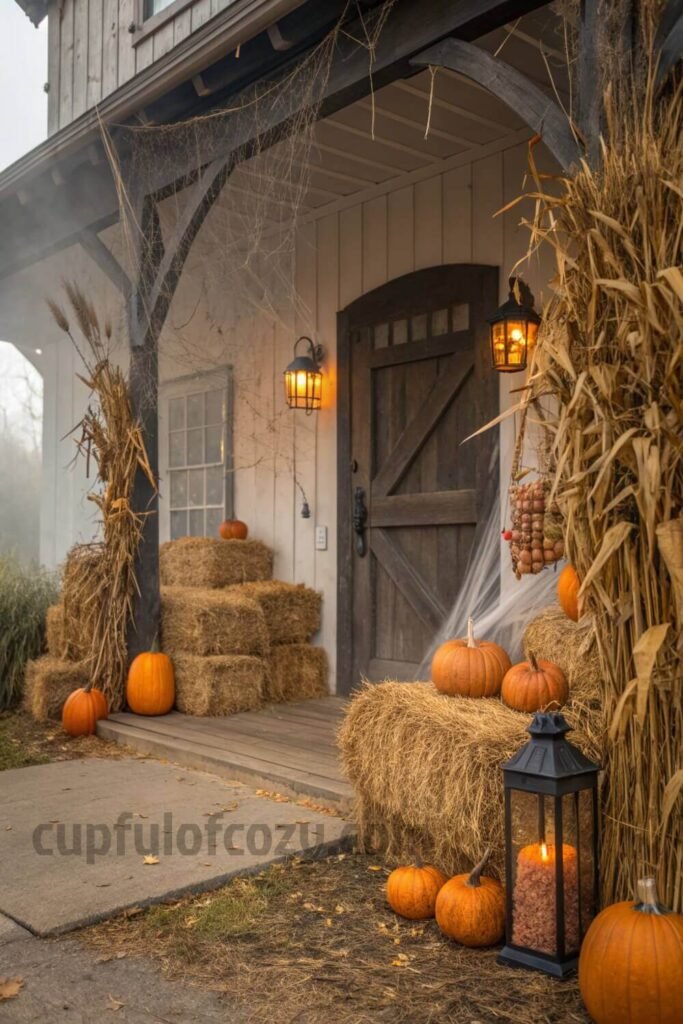
5. Add Soft Lighting That Actually Works
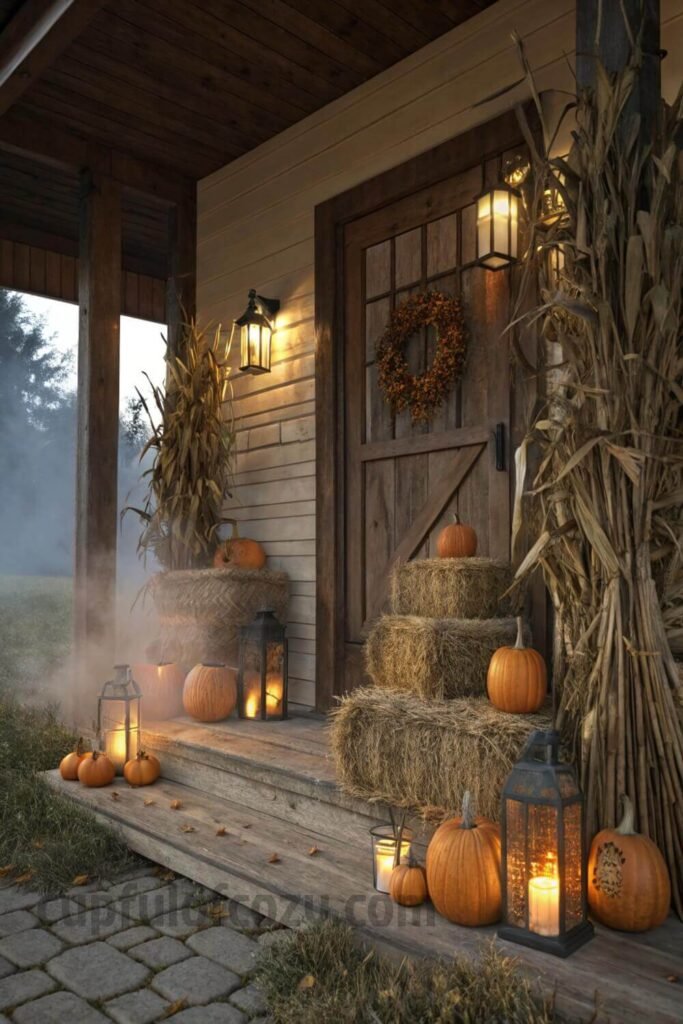
I used to think outdoor lighting was too much work until I stayed at this little B&B in Vermont where they had the most incredible pumpkin display with these warm lanterns nestled throughout. It completely changed how I think about fall decorating.
String lights woven through your pumpkins and hay, or a few battery-powered lanterns (because who has time to run extension cords?) create this cozy glow that makes your entrance feel like something out of a movie. The trick is keeping the lighting warm and soft, no harsh white LED stuff that makes everything look like a parking lot.
What gets me excited about this tip is how it extends the life of your display. During the day it’s pretty, but at night with the right lighting, it becomes something special that makes people pause on their evening walks.
6. Think in Odd Numbers
My grandmother always told me this, and I thought it was just one of her random superstitions until I started actually paying attention. Groups of three or five pumpkins look so much more natural than pairs or even numbers. I don’t know why, but it’s like some kind of visual psychology thing.
When you’re arranging, cluster them in threes: maybe a big one, medium one, and small one together. It creates this flow that feels organic instead of forced, like they just naturally grew there in the perfect arrangement.
This rule works for almost everything in decorating, but it’s especially noticeable with pumpkins because they’re such strong visual elements. Even numbers create this formal, symmetrical feeling that doesn’t match the casual vibe we’re going for.
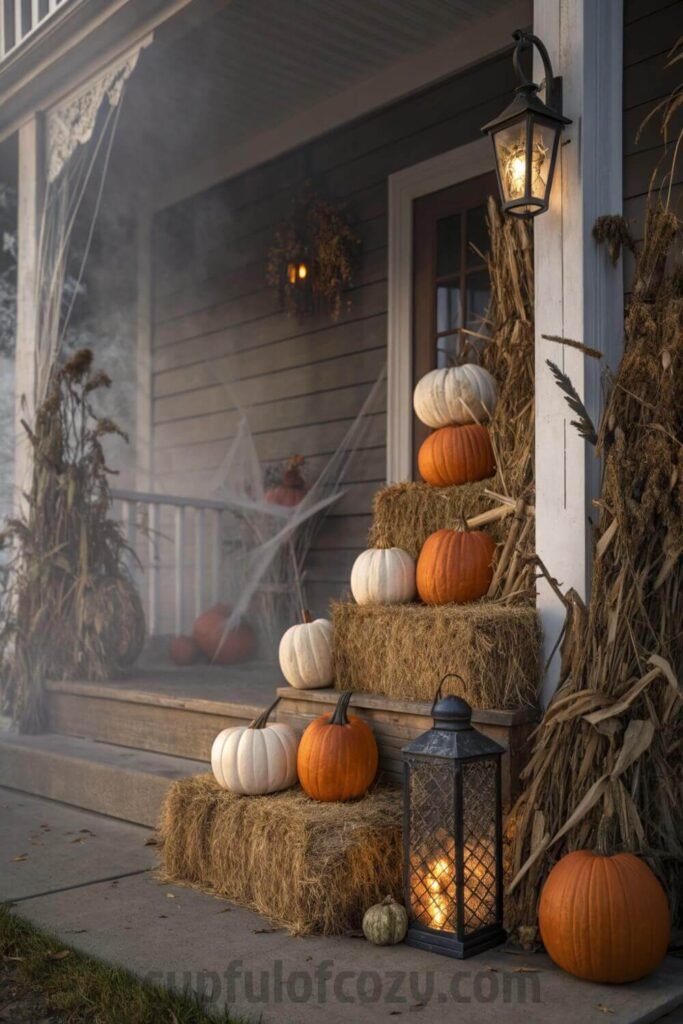
7. Stack ‘Em High with Pumpkin Towers
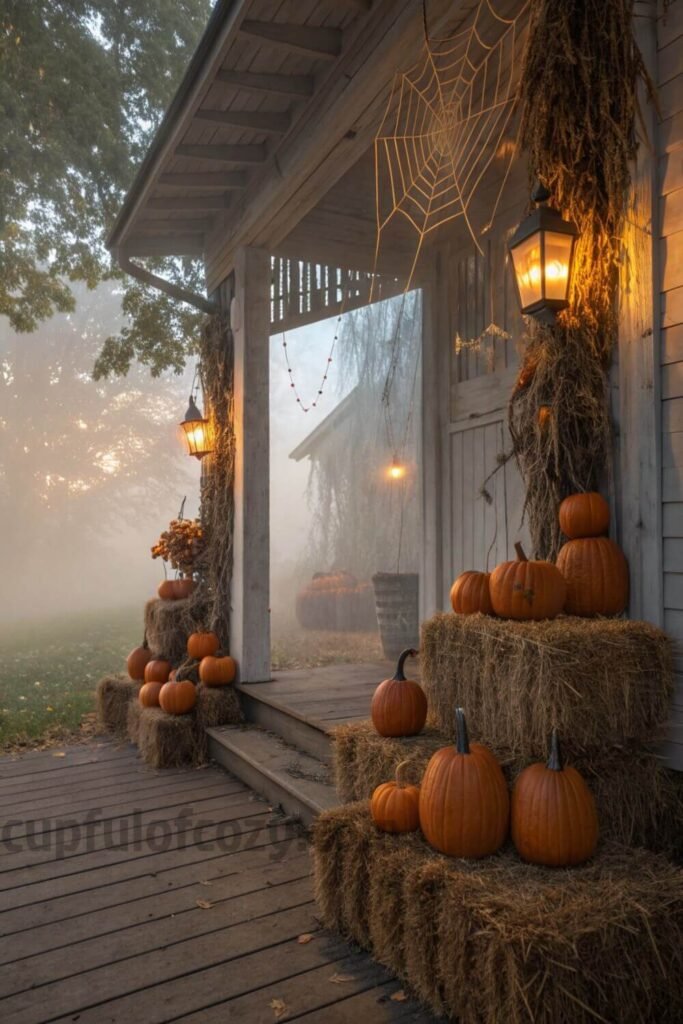
I saw this idea at this cute little farm stand last year, and it was so simple but striking. They had these tall towers of pumpkins stacked on hay bales, biggest on bottom, smallest on top. It’s like making a pumpkin snowman, but way more elegant.
The height adds drama without taking up more ground space, which is perfect if you’ve got a small entrance or you’re working with what you’ve got. Just make sure the bottom pumpkin has a flat surface. I learned that one the hard way when my tower became a pumpkin avalanche.
What I didn’t expect was how much this technique draws the eye upward, making your whole entrance feel more grand and impressive. It’s a simple trick that has a big impact.
8. Layer in Some Texture
Here’s where you can get creative with what you’ve already got or can easily find. I love adding some dried corn (you can usually grab ears from the grocery store), fall mums in their little pots, and maybe a rustic wooden sign if I’m feeling fancy.
The goal is mixing textures: smooth pumpkins, rough hay, papery corn husks, soft flower petals. It makes your display feel rich and thoughtful instead of flat. Plus, mums are usually on sale everywhere in October, so it’s an easy add that makes a big impact.
My mom always said that the best rooms had something rough, something smooth, and something soft. Same principle applies to outdoor decorating, those varied textures create interest that keeps people looking.
9. Embrace the Spooky with Strategic Webbing
I used to think fake spider webs looked cheap until I figured out the secret: less is more, and placement is everything. Instead of going crazy and webbing everything, I just drape some strategically across a few pumpkins or between cornstalk bundles.
Add a plastic spider or two (the realistic-looking ones, not the neon ones), and suddenly your rustic display has just enough spook factor to feel Halloween-y without looking like a Spirit store exploded in your yard.
What works best is treating the webbing like an accent rather than the main event. A little bit in the right spots creates mystery and atmosphere without overwhelming the natural beauty of your other elements.
10. Let Things Spill Naturally
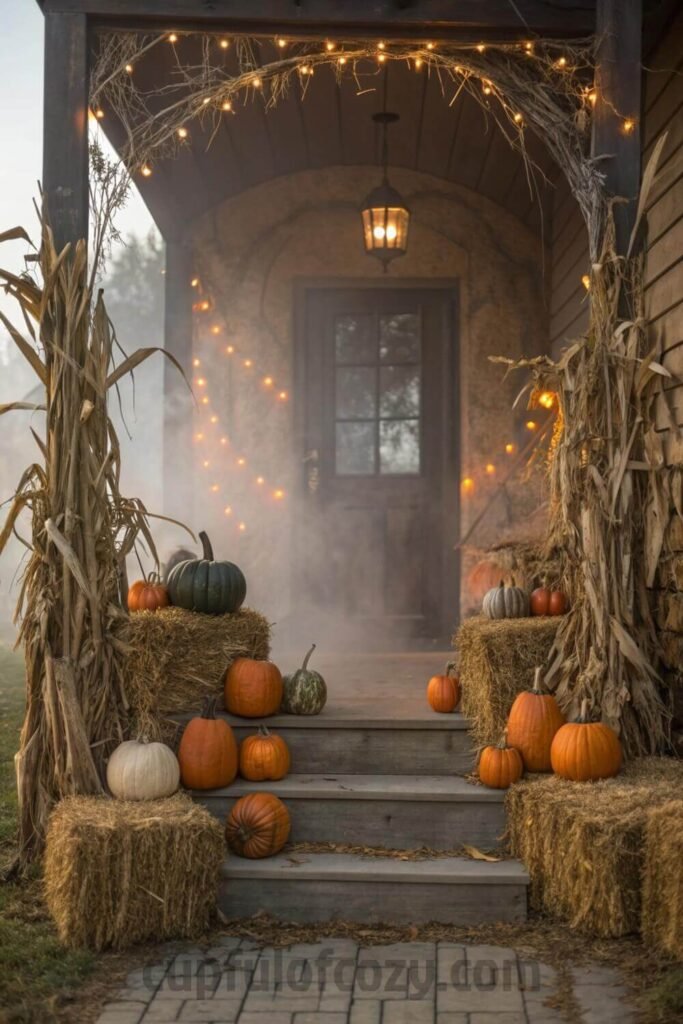
This tip came from watching my friend arrange her porch last fall. Instead of keeping everything contained in one area, she let pumpkins “spill” down her front steps and under benches. It looked so effortless and abundant.
The spilling effect makes your entrance feel welcoming and lived-in, like your home is overflowing with fall goodness. Just place pumpkins on different levels: steps, benches, the ground, and let them create this natural cascade that draws people in.
What I love about this approach is how it makes your display feel generous and uncontained, like autumn couldn’t help but overflow from your front door into the surrounding space.
11. Pull It All Together with Cozy Touches
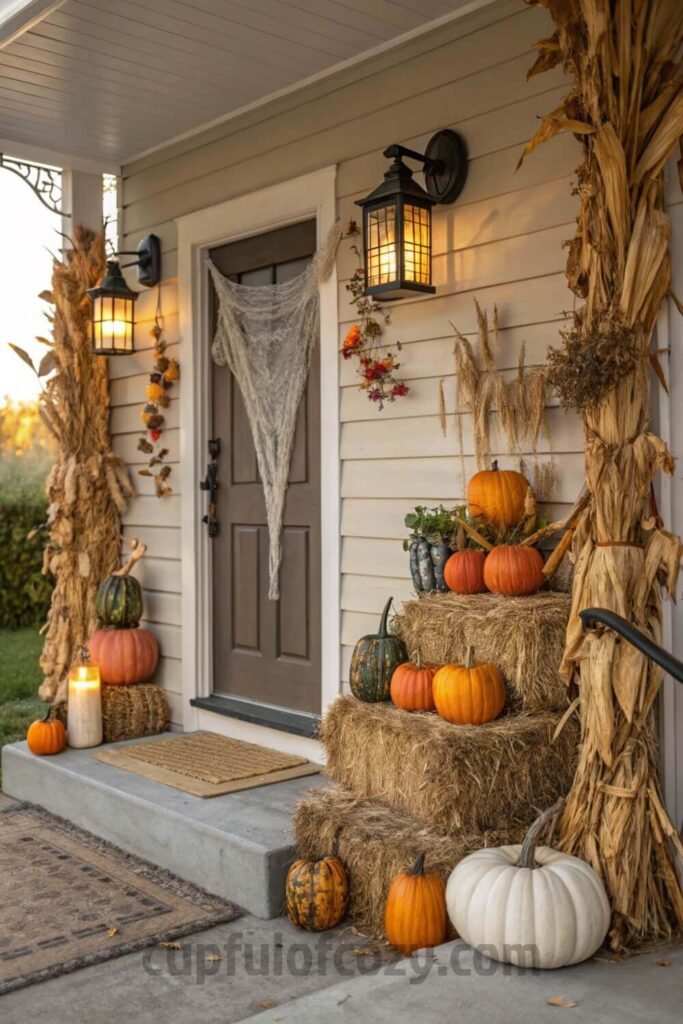
The final layer is what makes your entrance feel like home instead of just decoration. I’m talking about things that make people want to sit and stay: a soft outdoor rug, some seasonal pillows on a bench, maybe a cute “Welcome” sign that fits your vibe.
These finishing touches are what make the difference between a display that looks nice and one that feels inviting. It’s like the difference between a house and a home, those little comfort details that make people feel genuinely welcomed.
My friend always says that the best decorating makes people want to stay longer, and these cozy elements are what create that feeling. They’re the details that turn your entrance into a destination rather than just something pretty to walk past.
Final Thoughts
Here’s what I’ve learned after years of both epic decorating fails and surprising successes: creating a beautiful fall entrance doesn’t have to be perfect or Pinterest-worthy to be wonderful. Some of my favorite seasonal displays have been the ones I threw together last-minute with whatever I could find.
Your entrance should feel like you: warm, welcoming, and maybe a little bit special. Whether you use all eleven of these tips or just the ones that speak to you, remember that the best decorating comes from the heart, not from following rules perfectly. Now go make your entrance gorgeous, and don’t forget to take a picture to make the rest of us envious.
Related posts:
10 Space-Saving One Wall Kitchen with Island in Small Kitchen to Maximize Storage
12 Last-Minute Fall Table Setting Hacks That Look Expensive But Cost Under $20
10 Easy Ways to Get Picture-Perfect Christmas Garland on Glass Staircase for a Festive Glow-Up
7 Creative Ways to Secure Heavy Garland on a Staircase Without Nails
- Before buying anything online, check Rakuten (formerly Ebates) — either with the browser extension or directly on Rakuten.com. Just type in your store, click the current deal, and shop as usual. Every purchase earns you cashback that can be mailed to you or sent via PayPal. In today’s economy, even a few dollars back can turn into a Starbucks latte, McDonald’s fries for the kids, or a little treat you don’t have to budget for. If you’ve never used Rakuten before, you’re missing out on free money — and right now, you’ll even get a $30 bonus when you spend your first $30. Click here to sign up and stop letting your online orders steal from you. Click here to sign up and save money!
*Disclosure: This post includes affiliate links. I may earn a small commission if you join Rakuten through my link — but it doesn’t cost you anything extra. In fact, you’ll actually save more!