
So last weekend I was scrolling Pinterest at like 1 AM (don’t judge me), and I came across this photo of the most adorable Halloween gnome door hanger. You know that feeling when you see something and immediately think “my kids would DIE for this”? That was me. I screenshot it faster than my nephew runs to the ice cream truck.
But here’s the backstory: I’ve been on this mission to find craft projects that don’t make me want to lock myself in the bathroom after ten minutes. You know what I’m talking about, right? Those Pinterest “easy” projects that require seventeen specialty tools and leave your dining table looking like a glitter bomb exploded? Yeah, I’m over those.
These Halloween gnome door hangers though? They hit different. They’re rustic farmhouse vibes, which basically means if something looks a little wonky, that’s the whole point. Plus, my kids can actually help without me having a complete stress breakdown about paint on the walls. After the summer we’ve had with them bouncing off the walls, I needed a project that would keep them engaged for more than five minutes.
I started with just one gnome design, but then my daughter saw me working on it and said, “Mom, can we make a whole family?” And you know how it is, once kids get that spark in their eyes, you’re committed. So here we are with twelve different styles that’ll keep your little ones busy while you pretend you have everything under control.
Here’s what I learned from doing this with my kids: bigger wooden gnome cutouts are your friend. Trust me on this one. Little hands and tiny pieces don’t mix well, and nobody has time for meltdowns over dropped buttons.
Why These Gnome Door Hangers Will Save Your Halloween Sanity
Look, I’m gonna be real with you: Halloween decorating with kids can either be the most wonderful experience ever or a complete disaster that ends with someone crying (and it might be you). These gnome door hangers fall squarely in the wonderful category, and here’s why you should care.
First off, they’re actually doable on a Tuesday evening when you’ve got thirty minutes and the kids are getting restless. No special trips to craft stores for weird supplies, most of this stuff you probably have in your junk drawer already. And if you don’t? Dollar store, baby.
But the real reason this project matters is because it gives your kids something they made with their own hands hanging on your front door. Every trick-or-treater who comes by will see their work, and that pride? You can’t buy that feeling. My son runs outside every morning to check if his gnome is still there, and he points it out to every neighbor who walks by.
Plus, these aren’t just October decorations. Switch out a few elements and they work for Thanksgiving, winter, even spring. I’m already planning woodland versions for next year because my kids are obsessed with the mossy one we made.
The Little Details That Make All the Difference
Here’s what most craft tutorials won’t tell you: it’s not really about following the directions perfectly. The wonderful stuff happens in those little moments when your kid decides their gnome needs purple polka dots or when they insist on using seventeen different colors for one hat.
The biggest thing people miss is prep work. I know, I know, prep work sounds boring, but hear me out. Spending ten minutes cutting felt shapes ahead of time means your kids can jump straight into the fun stuff instead of watching you fumble with scissors while they lose interest. Trust me on this one.
Also, nobody talks about the mess factor realistically. Yes, there will be paint on things. Yes, glitter will end up in places glitter should never be. But if you lay out a plastic tablecloth and accept that chaos is part of the process, it becomes way less stressful. My dining room table has seen worse, and we all survived.
Here’s something I wish someone had told me: let each kid work on their own gnome at their own pace. My daughter likes to plan everything out first, while my son just dives right in. Trying to make them work the same way was a recipe for frustration until I figured out that different approaches can create equally amazing results.
1. Classic Pumpkin Patch Gnome
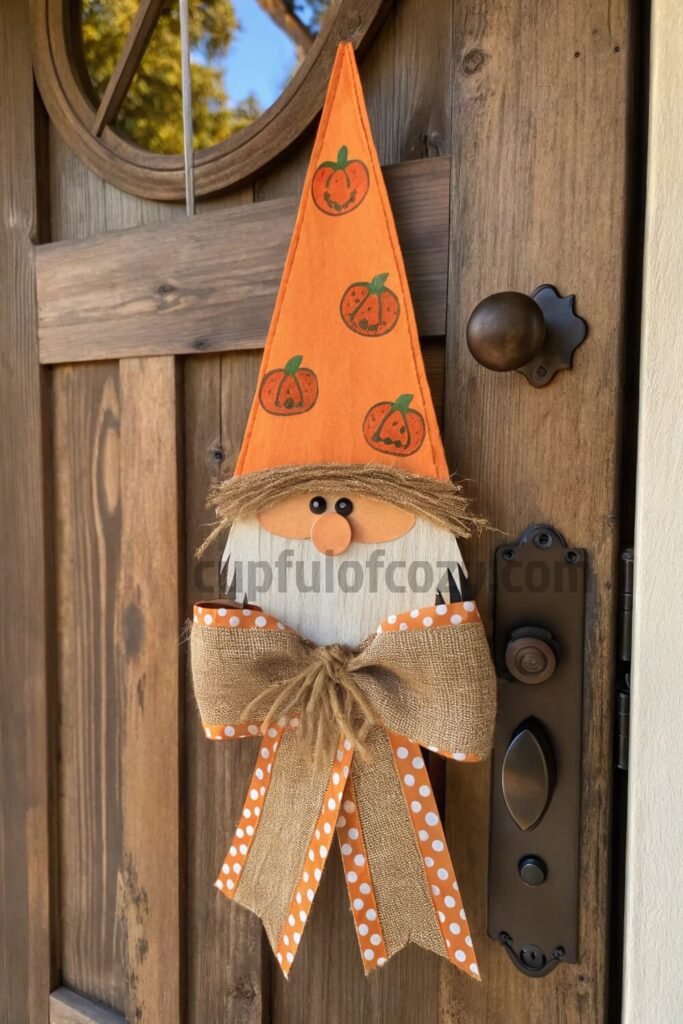
This one screams autumn in the best possible way. Your kiddo painting that gnome hat in the most gorgeous pumpkin orange, you know, the kind that makes you want to drive to the nearest pumpkin patch immediately. I let my daughter go wild with orange paint, and she stenciled tiny pumpkin shapes all around the brim like she was decorating the world’s cutest hat.
The real joy happens when you add those little faux pumpkins around the hat. My neighbor saw us working on this and said it looked like something straight out of a country living magazine. We used raffia from my craft stash (okay, fine, I bought it specifically for this project) and some burlap I’ve been hoarding since last fall. The texture combo is chef’s kiss.
2. Ghostly Gnome with Messy Bow
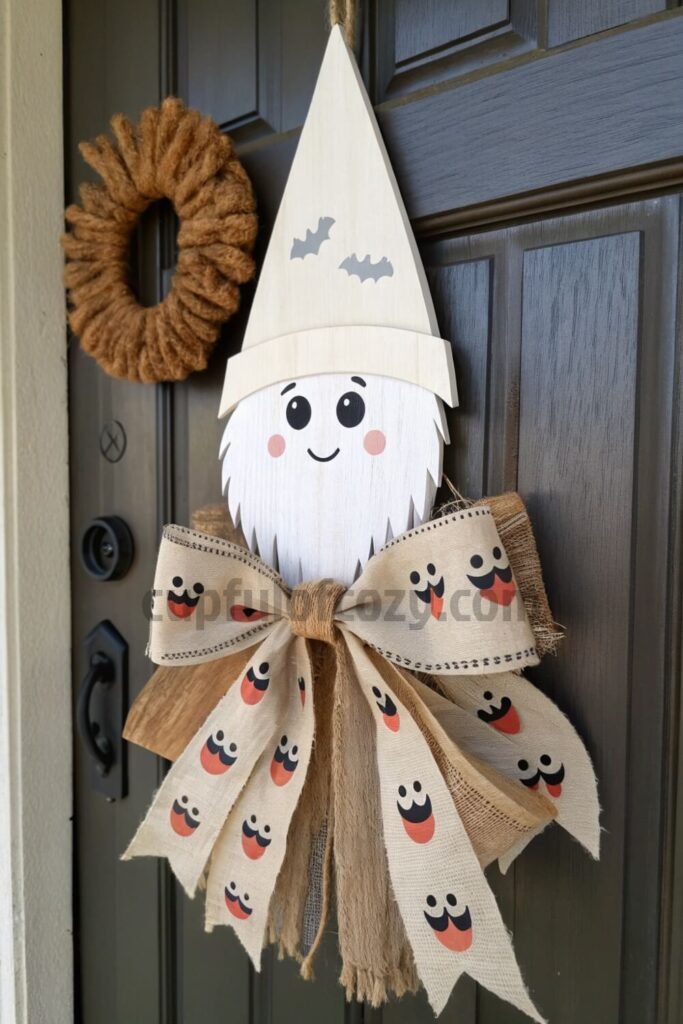
The messy bow trend is everything right now. My sister showed me this technique where you just grab random fabric scraps, burlap, and whatever ribbon you have lying around and tie it all together in the most beautifully chaotic way possible.
For the ghost faces, I gave my son a tiny brush and white paint, and he went to town painting the sweetest little ghost expressions on the hat. Some looked happy, some looked surprised, it was like a whole ghost family reunion happening on this gnome’s head. The googly eyes were his favorite part, obviously. Something about a six-year-old carefully placing googly eyes just fills your heart up completely.
3. Candy Corn Gnome
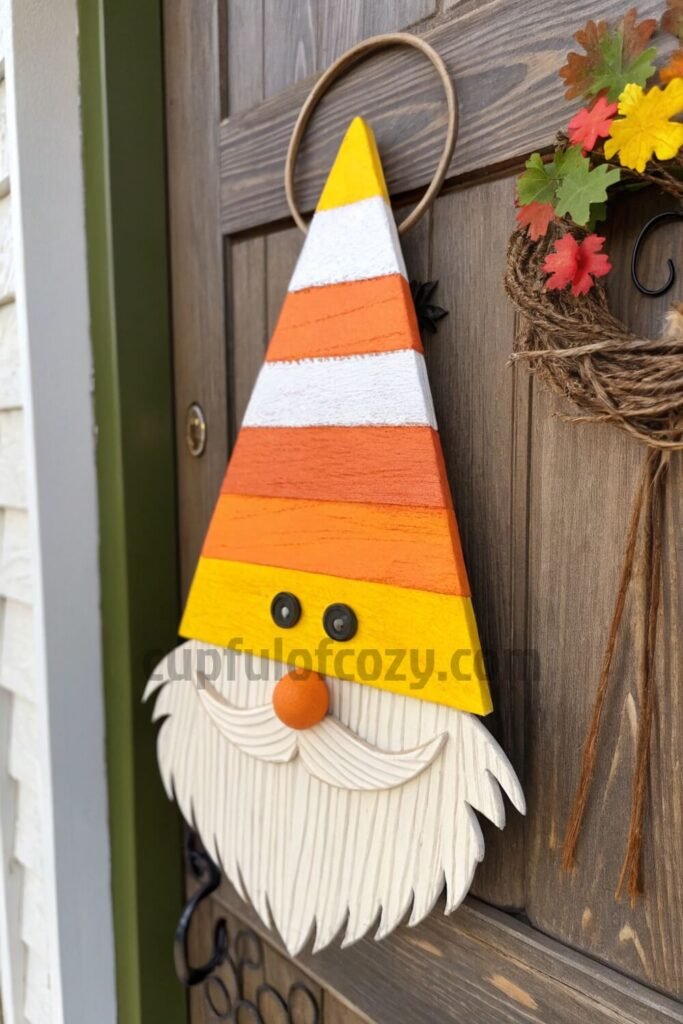
This one takes me straight back to Halloween when I was little. You know those candy corn memories that just hit different? My kids had never actually eaten candy corn (I know, I know), but they went nuts for these colors. Yellow, orange, white, they painted those stripes like they were creating a masterpiece.
The wooden bead nose is genius because it gives kids something substantial to glue on without the frustration of tiny pieces. And that felt beard? My daughter insisted on cutting it herself, which resulted in the most wonderfully wonky beard shape that somehow made the whole thing even more charming.
4. Witch Hat Gnome
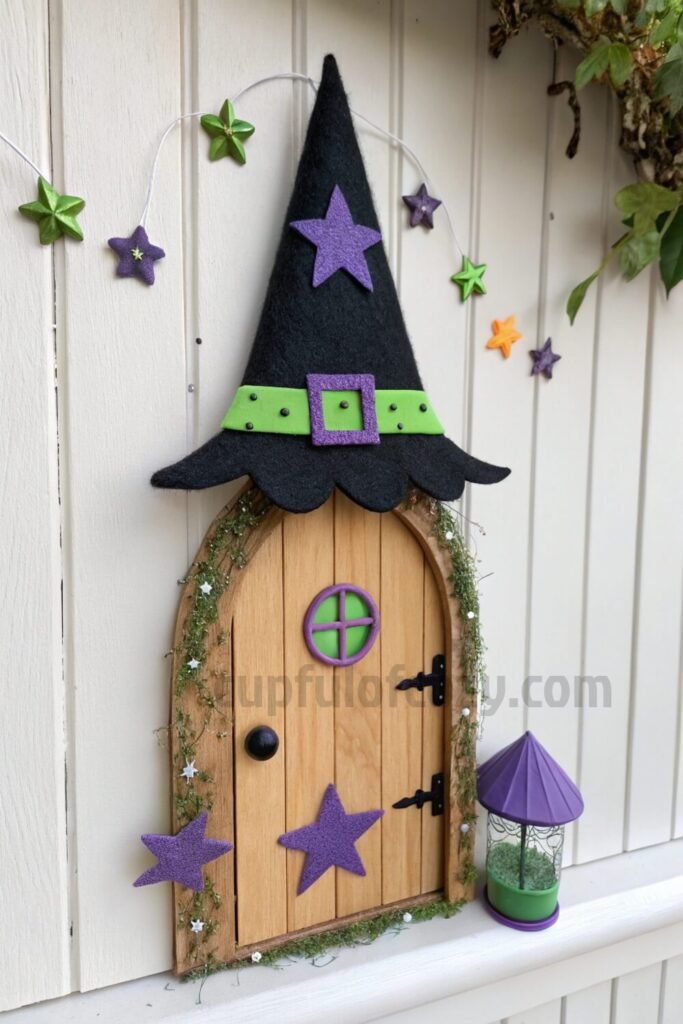
This one is where things get incredible. We shaped the hat with black felt (which, side note, is so much easier to work with than I expected), and then I watched my kids go wild with purple and green paint. Sparkles everywhere, but honestly? Worth it.
The mini felt moon and stars were a hit, but the real winner was those sparkly pipe cleaners sticking out like witch hair. My son called them “special whiskers,” and now I can’t unsee it. Sometimes kids just nail the perfect description, you know?
5. Harvest Scarecrow Gnome
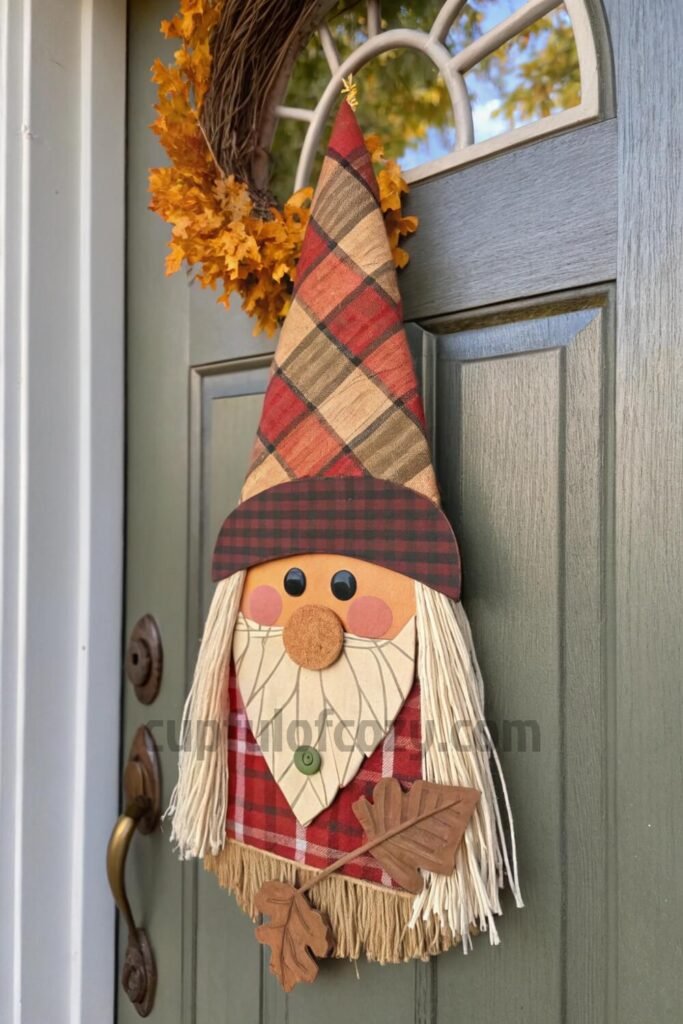
This one gives me all the cozy fall feelings. We wrapped the hat in this gorgeous plaid fabric I found at the thrift store (because I’m always there, let’s be real), and the kids painted these tiny patchwork sections that looked like something out of a storybook.
The raffia beard was where things got interesting. My daughter decided her scarecrow gnome needed “fancy hair,” so she braided sections of the raffia. It shouldn’t have worked, but it did. Sometimes you just have to let kids follow their creative instincts and wonderful things happen.
6. Mossy Woodland Gnome
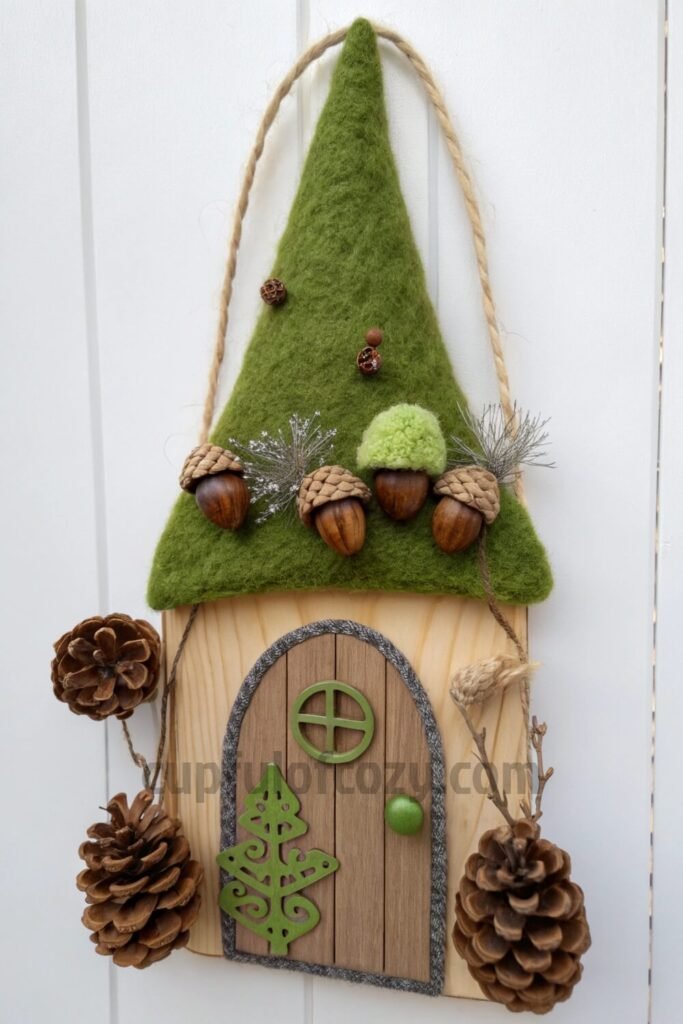
This one happened because we went on a nature walk and came back with pockets full of pinecones and acorns. You know how kids are, everything becomes a treasure. I had this idea to use green felt and faux moss to create this woodland vibe, and it turned out even better than I imagined.
The kids were obsessed with arranging the pinecones and acorns just right. My son spent twenty minutes deciding where each acorn should go, treating them like precious gems. We used twigs from our backyard as embellishments, and now every time we walk past it on the door, he points out “his” twig.
7. Jack-o’-Lantern Gnome
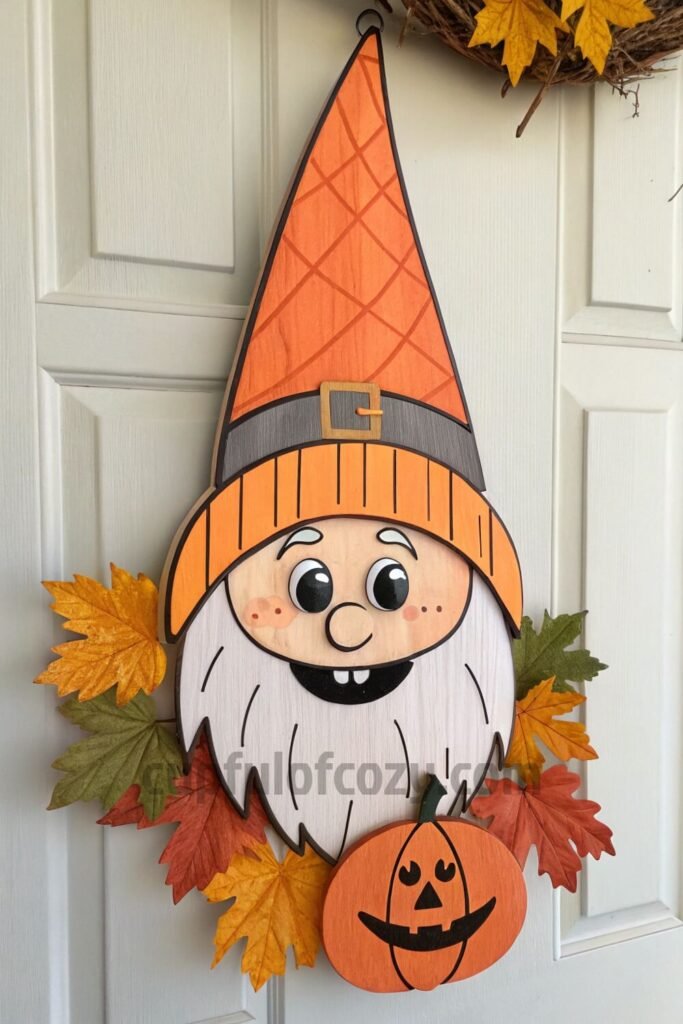
Some projects just make kids giggle uncontrollably, and this was definitely one of them. Watching my kids paint goofy jack-o’-lantern faces was pure joy. My daughter went for classic spooky, while my son painted what he called a “surprised pumpkin face” with huge round eyes.
The faux pumpkin stems we glued to the hat were the perfect finishing touch. Something so satisfying about those little details that make the whole thing come together. Plus, leaves from our yard made it feel even more authentic and connected to our space.
8. Black Cat Gnome
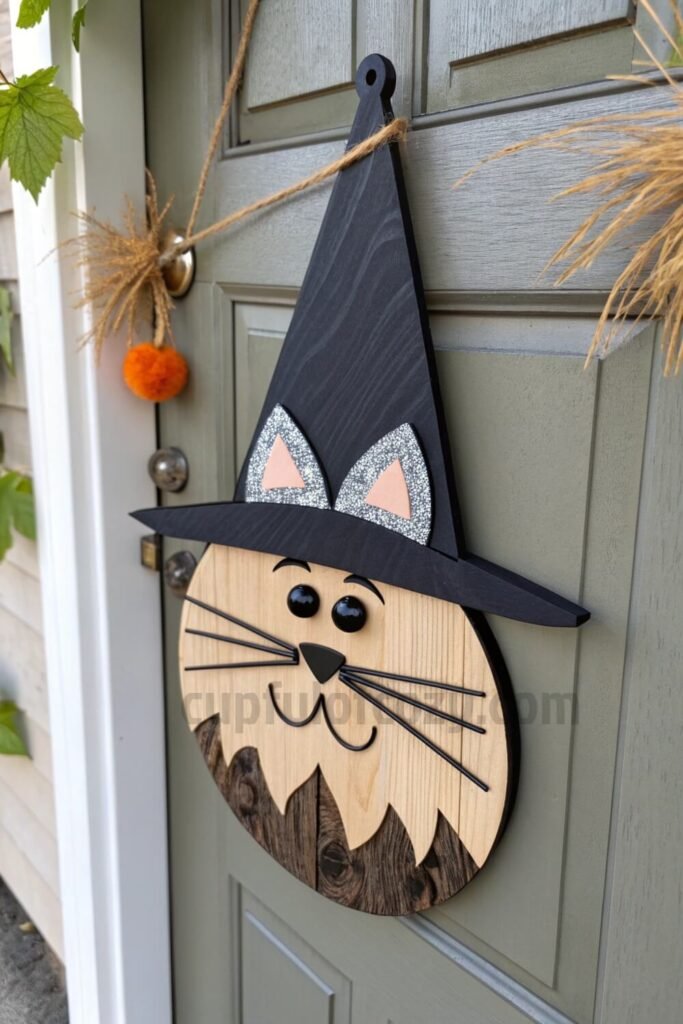
This one was inspired by our neighbor’s cat who sits on our porch every morning like she owns the place. The felt cat ears were surprisingly easy to cut out, and the kids had a blast painting that hat with black paint and adding silver glitter whiskers.
The mini pom-pom nose was my daughter’s idea, and watching her carefully glue it on with her tongue sticking out in concentration, that’s the stuff that makes these projects worth every bit of mess and chaos.
9. Spider Web Gnome
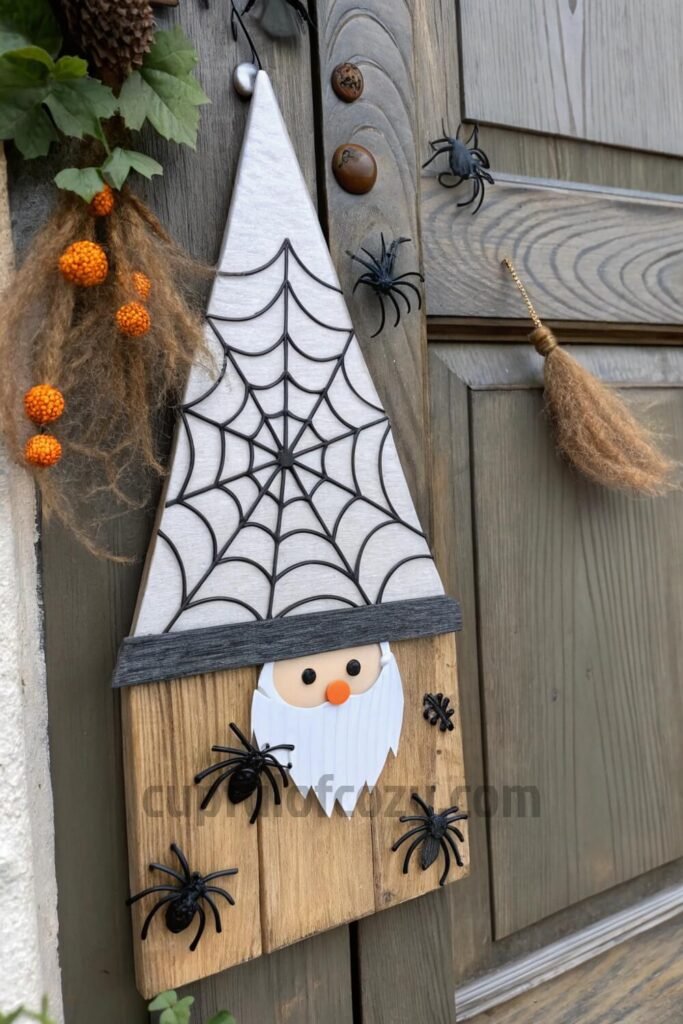
I’ll be real, I’m not usually a spider person, but something about these painted spider webs felt more whimsical than scary. The kids used black paint markers to draw the webs, and their interpretations ranged from perfectly geometric to beautifully abstract.
We made our own spiders from craft pom-poms and pipe cleaners instead of using plastic ones, and they turned out so cute I almost didn’t want to call them spiders. My son named his spider “Webster” and insisted it needed to stay on his gnome forever.
10. Plaid Flannel Gnome
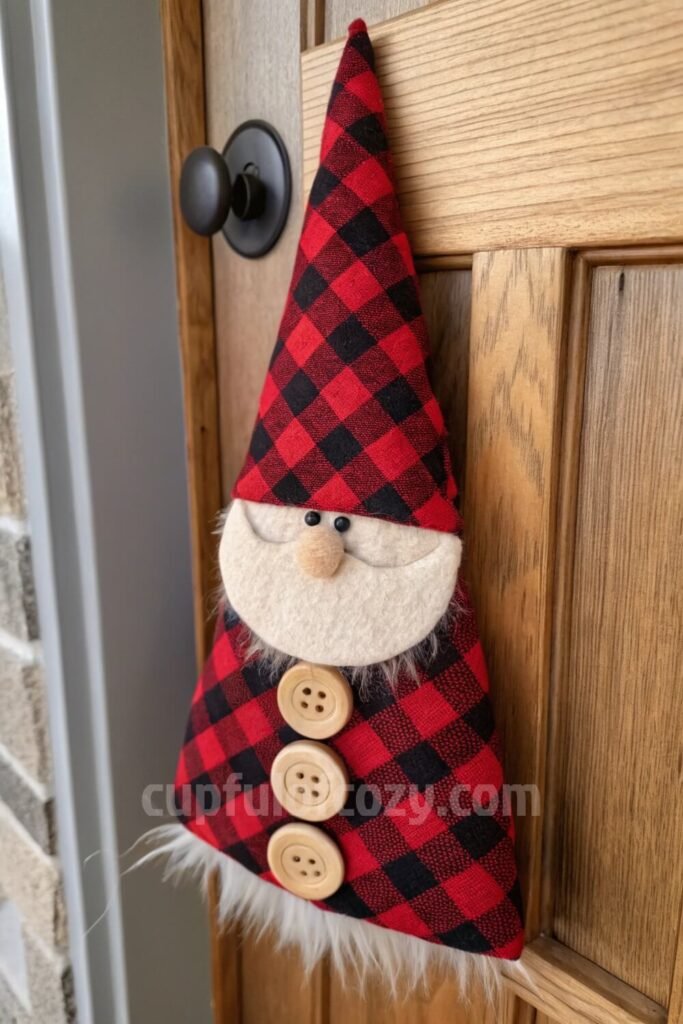
Plaid just screams comfort and home, you know? We wrapped this gnome’s hat in the softest flannel, and I let the kids pick their favorite pattern from my fabric stash. My daughter went for classic red and black, while my son chose this unexpected blue and green combo that somehow worked perfectly.
The wooden buttons down the front were the perfect rustic touch. Each kid got to choose their own buttons, and they took this responsibility very seriously, testing different sizes and colors like they were styling the most important outfit ever.
11. Batty Gnome Door Hanger
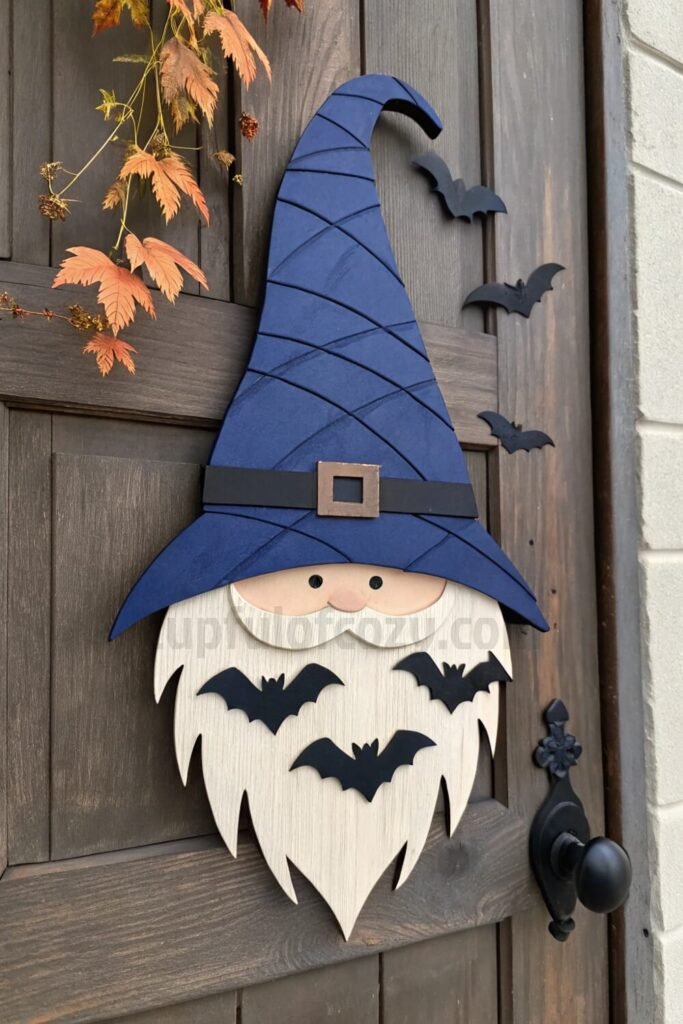
Midnight blue paint has this way of making everything feel mysterious and special. The kids painted the hat in this gorgeous deep blue, and then we cut felt bat shapes together. Well, I cut while they “supervised” and offered very detailed opinions about wing shapes.
Gluing the bats onto the hat and beard created this perfect scattered effect that looked intentional and whimsical at the same time. My daughter arranged hers in a neat line, while my son went for more of a “bats flying everywhere” vibe.
12. Interchangeable Holiday Gnome Hats
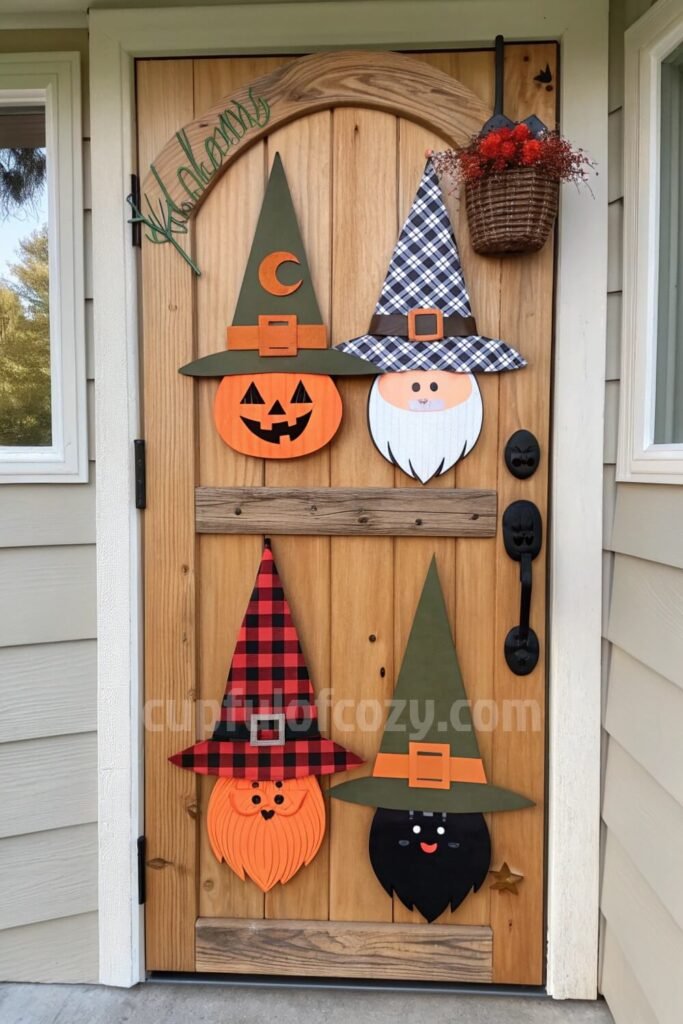
This idea came from my mom, who’s always been the queen of practical crafting. She suggested making multiple hats that could swap out, and it’s genius. We prepared witch hats, pumpkin hats, scarecrow hats, and black cat hats, and the kids painted each one like they were creating a whole wardrobe.
Using Velcro made it easy enough for little hands to change the hats whenever the mood struck. My son changes his gnome’s hat almost daily now, and each morning he announces which “mood” his gnome is in. It’s become this sweet little ritual that makes me smile every time.
Making It Work for Your Crew
I set up a whole buffet of pre-cut felt, fabric squares, wood blocks, and embellishments so the kids could choose their own adventure. It felt like letting them loose in a craft candy store, and their faces were priceless.
Nontoxic acrylic paints are non-negotiable, and child-safe craft glue saves everyone’s sanity. I learned this the hard way with previous projects that shall remain nameless.
The real bliss happens when you just let go and let them create. Offer stencils for the kids who want structure, but don’t be surprised if they go completely off-script. Some of the best moments came from their unexpected choices, like when my daughter decided her gnome needed glitter eyebrows or when my son painted tiny hearts on his witch hat.
This ended up being perfect for a playdate too. Four kids, twelve gnomes, and somehow everyone stayed happy and engaged for hours. Each kid signed the back of their creation, and now we have these sweet little time capsules of their personalities captured in paint and felt.
These little door hangers have become some of our favorite fall decorations, not because they’re perfect, but because they’re perfectly ours. Every wonky paint stroke and crooked felt piece tells the story of an afternoon spent creating together, and that’s worth way more than anything you could buy at the store.
Final Thoughts
These little gnome door hangers have become some of my favorite things we’ve made together. Not because they’re perfect, trust me, they’re far from it, but because they capture this moment in time when my kids still think spending an afternoon crafting with mom is the best thing ever.
Every time someone compliments our Halloween decorations, my kids beam with pride and launch into detailed explanations of which parts they painted and why they chose certain colors. Those conversations are worth every bit of cleanup and chaos that went into making these little guys.
So grab some paint, put on clothes you don’t care about, and let your kids create something wonderful. The memories you’ll make are so much better than anything you could order online, and your front door is going to look incredible.
Real Talk: Questions You’re Probably Still Wondering About
Q: Okay but seriously, how messy does this actually get? A: I’m not gonna lie to you, there will be paint places paint shouldn’t be. But it’s not the nightmare you’re imagining. I lay out a plastic tablecloth, use paper plates for paint palettes, and keep wet wipes within arm’s reach. The cleanup takes maybe fifteen minutes, and seeing my kids’ faces when they’re creating is worth every bit of scrubbing I have to do later.
Q: What if my kid loses interest halfway through? A: This happens more than you think! My son got distracted during the witch hat gnome and wandered off to play with Legos. I just saved his progress and we came back to it the next day. These aren’t race projects, they can happen over several days if needed. Sometimes the anticipation of finishing makes them even more excited about it.
Q: Do I really need to buy all those fancy craft supplies? A: Nope! I started with basic acrylic paints from the dollar store, felt pieces I already had, and random buttons from my sewing box. The only thing I’d splurge on is child-safe glue that actually works. Cheap glue leads to frustrated kids and decorations falling apart, and nobody has time for that drama.
Q: How long do these actually last hanging outside? A: Mine have been up since early October and they’re holding up great! I did spray them with a clear acrylic sealer before hanging them out, which probably helps. But even if they only last one season, the memories and fun we had making them make it totally worth it. Plus, my kids are already planning next year’s designs!
Related posts:
- Before buying anything online, check Rakuten (formerly Ebates) — either with the browser extension or directly on Rakuten.com. Just type in your store, click the current deal, and shop as usual. Every purchase earns you cashback that can be mailed to you or sent via PayPal. In today’s economy, even a few dollars back can turn into a Starbucks latte, McDonald’s fries for the kids, or a little treat you don’t have to budget for. If you’ve never used Rakuten before, you’re missing out on free money — and right now, you’ll even get a $30 bonus when you spend your first $30. Click here to sign up and stop letting your online orders steal from you. Click here to sign up and save money!
*Disclosure: This post includes affiliate links. I may earn a small commission if you join Rakuten through my link — but it doesn’t cost you anything extra. In fact, you’ll actually save more!