I’m standing in my kitchen last Tuesday morning, coffee in one hand, trying to dig through three different cabinets to find the vanilla extract for my pancakes, when I had what my mom would call “a come-to-Jesus moment” about my storage situation. My kitchen is one of those cute but tiny spaces where you can touch both walls if you stretch your arms out, and every cabinet is packed tighter than my jeans after Thanksgiving dinner.
The thing is, I’ve been living in this apartment for almost three years now, and I keep buying the same stuff over and over because I can’t find anything. Last week I discovered I had FOUR bottles of soy sauce hiding behind cereal boxes and random cans of tomatoes. Four! My grandma would’ve had something to say about that kind of waste, let me tell you.
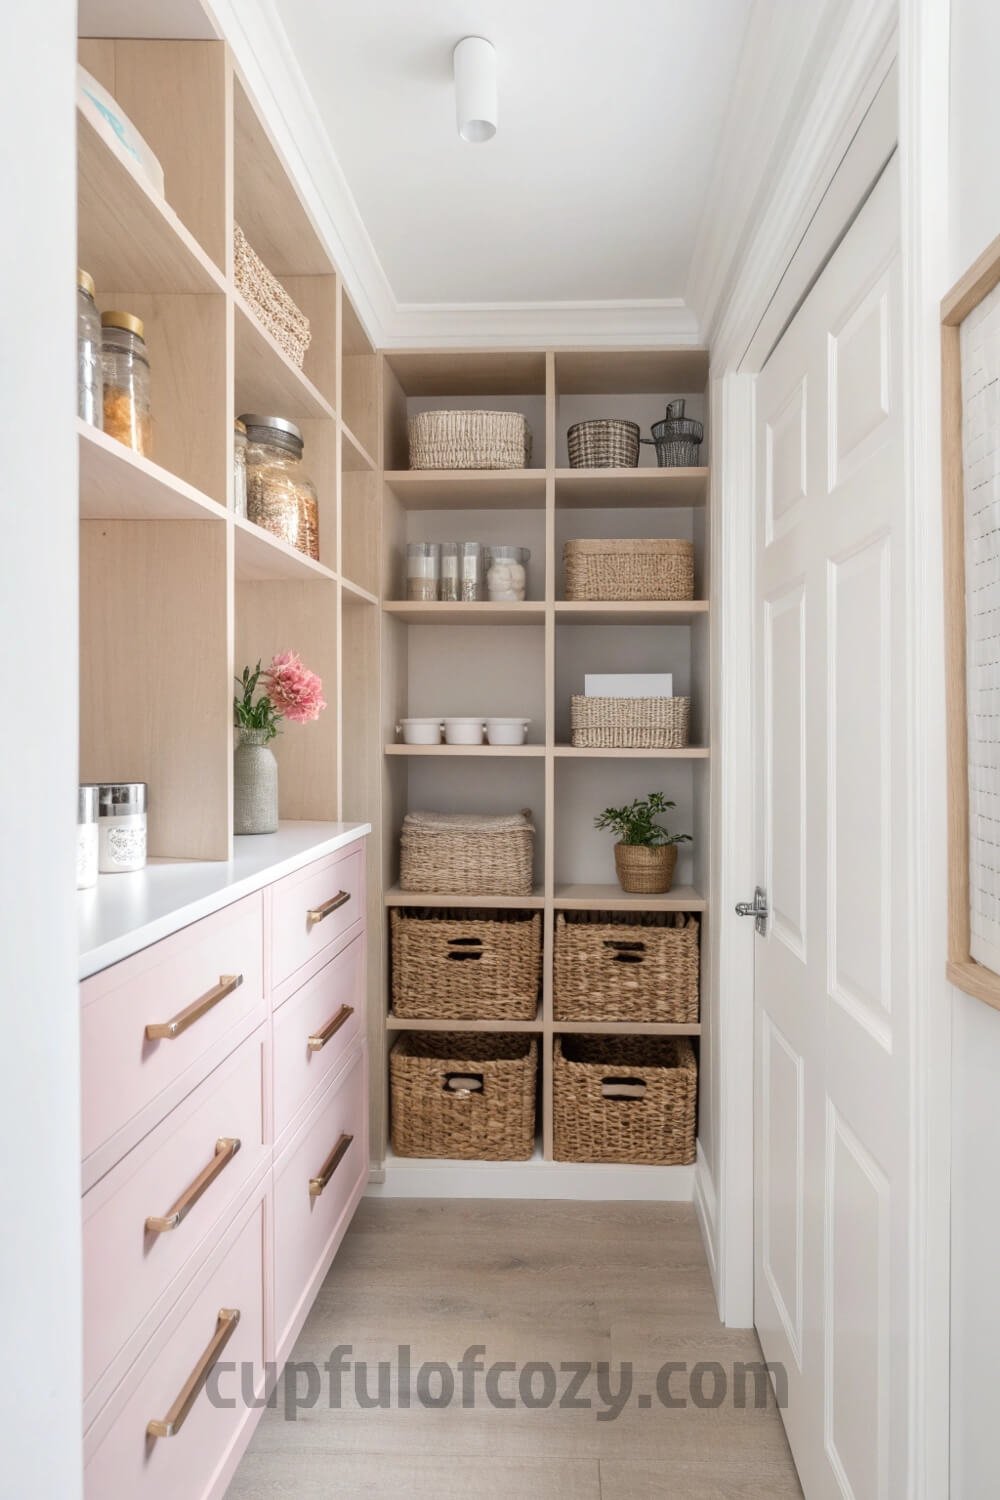
But here’s where it gets interesting. I’m standing there, frustrated and caffeinated, when I notice this closet right next to my kitchen. It’s one of those weird in-between spaces that builders probably threw in as an afterthought, about as wide as a grown person and maybe two feet deep. For three years, this thing has been my “junk jail” where I toss everything I don’t know what to do with: winter coats I never wear (because let’s be real, it’s Southern California), that bridesmaid dress from my cousin’s wedding, old textbooks I keep saying I’ll donate, and approximately seventeen reusable shopping bags.
The closet has this little wire shelf that came with the apartment, and honestly, I never gave it much thought. It was just there, existing, taking up space while my actual kitchen cabinets were bursting at the seams like overstuffed burritos.
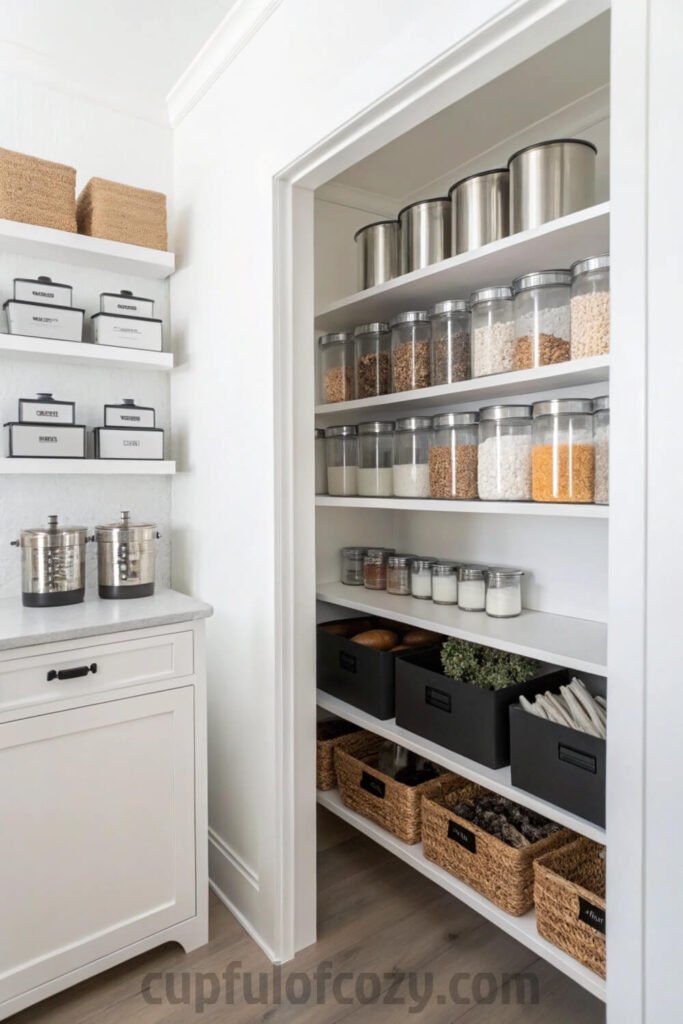
Then I was scrolling through Instagram, probably avoiding work, when this home organization account popped up with a before-and-after of someone who turned their coat closet into this incredible pantry space. The transformation was so dramatic I actually stopped scrolling and stared at my phone. Here was this person with basically the same weird little closet I had, but they’d turned it into something that looked like it belonged in a fancy magazine.
That’s when something clicked. I looked from my phone to that closet door, then back to my chaotic kitchen, and suddenly felt like I’d been walking around with the solution to my problems literally right under my nose this whole time. It was one of those moments when you realize you’ve been making life way harder than it needs to be.
I called my sister immediately because that’s what you do when you have a revelation at 8 AM on a Tuesday. “I’m converting my junk closet into a pantry,” I announced without even saying hello. She was quiet for a second, then said, “Wait, that’s actually genius. Why didn’t we think of that before?”
That question kept bouncing around in my head. Why hadn’t I thought of this sooner? This closet shares a wall with my kitchen, it’s got decent height, and it’s been sitting there empty except for stuff I never use anyway. Meanwhile, I’m playing Tetris with canned goods every time I open a cabinet.
My mom always used to say that sometimes the best solutions are hiding in plain sight, and boy was she right about this one. Growing up, we had this little pantry off our kitchen that was basically a converted broom closet, and it held everything from cereal to cleaning supplies. Some of my favorite childhood memories involve standing on a step stool, helping her organize those shelves and sneaking tastes of whatever she was cooking.
So that morning, still in my pajamas and riding the wave of caffeine-fueled determination, I decided I was going to make this happen. I was going to turn my neglected junk closet into a functional pantry that would actually solve my storage problems and maybe, just maybe, make cooking feel a little more organized and a lot less chaotic.
Why This Whole Closet-to-Pantry Thing Actually Works
Here’s what makes this so brilliant: you’re taking space that’s already there and making it actually work for you instead of just existing. No construction, no permits, no dealing with contractors who show up three hours late. Just smart use of what you’ve got.
My kitchen went from chaotic mess to actually functional, and I’m not exaggerating when I say it changed my whole cooking routine. Instead of buying the same spices three times because I couldn’t find them buried behind cereal boxes, everything now has a designated spot. The total cost? Around $200, which is basically what my neighbor spent on just the consultation for her kitchen renovation.
What gets me excited about this approach is how customizable it becomes. I’m all about those bulk rice bags and my growing collection of fancy vinegars, while my sister would probably use hers for her countless protein powders and supplement bottles. The space adapts to your actual cooking style.
Step 1: Pick Your Closet (Choose Wisely)
Location matters more than you might think. Something close to your kitchen makes sense because nobody wants to trek across the house every time they need olive oil. I got lucky because my random coat closet shares a wall with my kitchen, but even something down the hall can work if that’s your only option.
Size-wise, you don’t need something huge. My closet is maybe 3 feet wide and 2 feet deep, and I’ve managed to fit an impressive amount of stuff in there. Just make sure the structure feels solid: you don’t want shelves collapsing under the weight of all your canned goods.
Something I learned the hard way is to check for electrical access early. Digging around in a dark pantry trying to find the baking soda is not fun. I ended up getting those battery-powered LED puck lights from Amazon and they work perfectly for what I needed.
Step 2: Plan Like Your Organizing Future Depends on It
This part brought out my inner Type A personality. I measured EVERYTHING and sketched things out on graph paper like I was designing something important. My roommate walked by and asked if I was blueprinting a tiny house.
First, I categorized all my pantry stuff: canned goods, dry ingredients, snacks, small appliances, and what I call “fancy cooking things I use twice a year but refuse to get rid of.” Then I figured out how much vertical space I was working with, because using that full height is crucial.
I sketched out where different sized items would go, keeping in mind that I’d need a step stool for the top shelves. Daily essentials needed to live at eye level, while the truffle oil that only comes out for special occasions could live up high with the other “someday” ingredients.
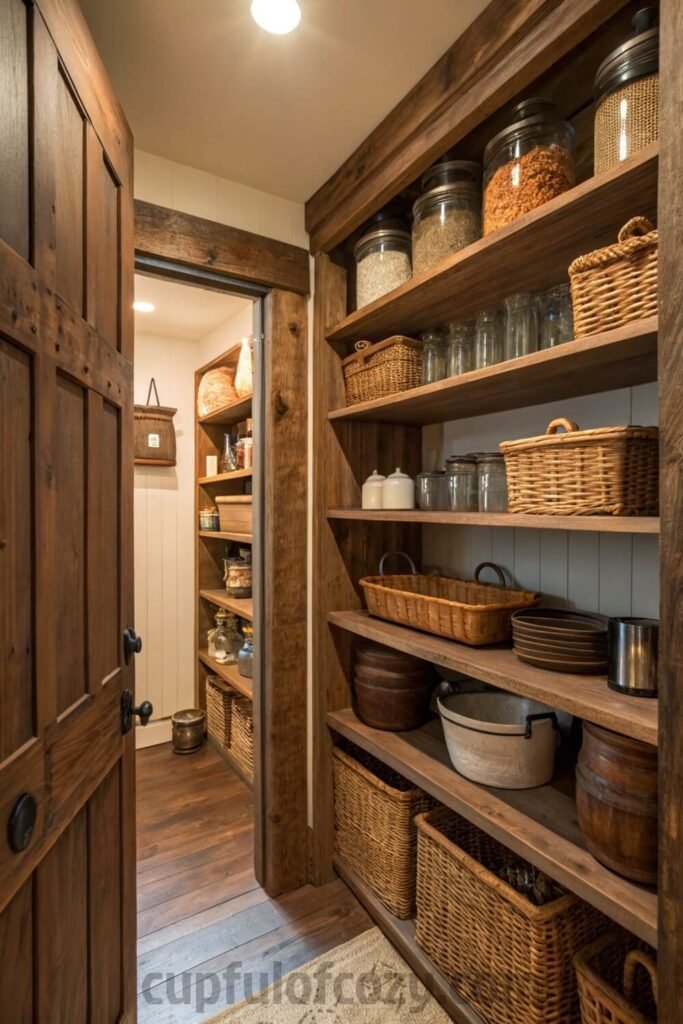
Step 3: Shelving is Where Everything Comes Together
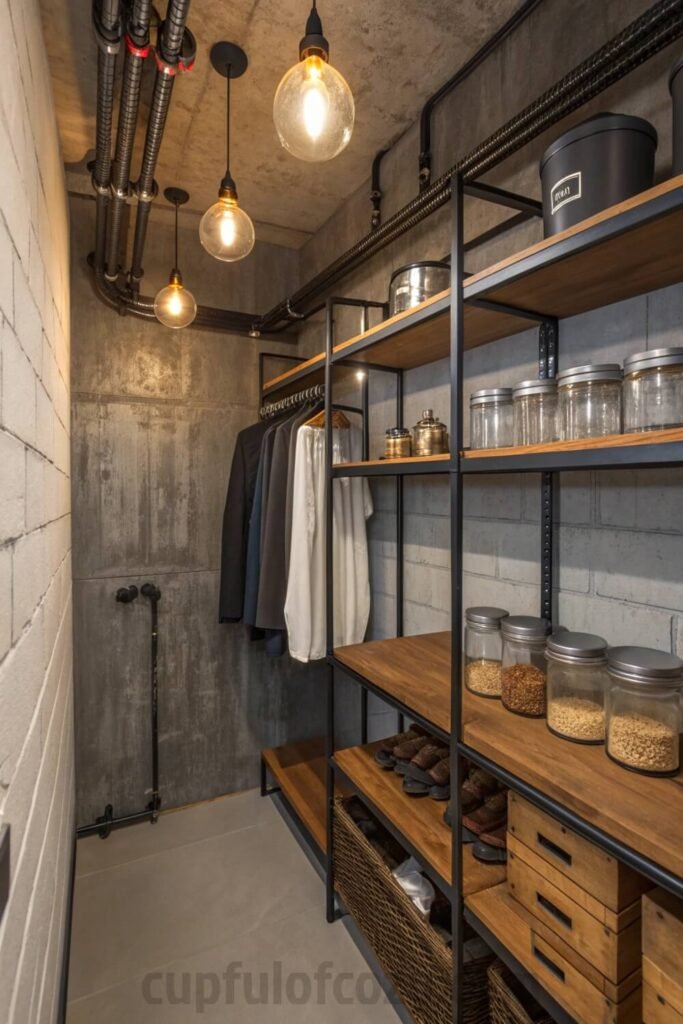
Don’t cheap out on materials here, trust me on this one. I went with adjustable metal shelving from Home Depot because I knew I’d want to move things around as my storage needs changed. Wood looks prettier, but metal feels more sturdy to me, especially for heavier items.
The bottom shelf became crucial for my heavy stuff: big bags of flour, cases of sparkling water, that giant container of protein powder that makes me feel healthy just looking at it. I also added some pull-out wire baskets for things like onions and potatoes that need air circulation.
Here’s something that surprised me: the door became prime real estate. I put up some narrow shelves and hooks for spices, measuring cups, and my growing collection of fancy salts. Opening it feels like revealing a little treasure trove every time.
Step 4: The Fun Part – Making it Actually Work
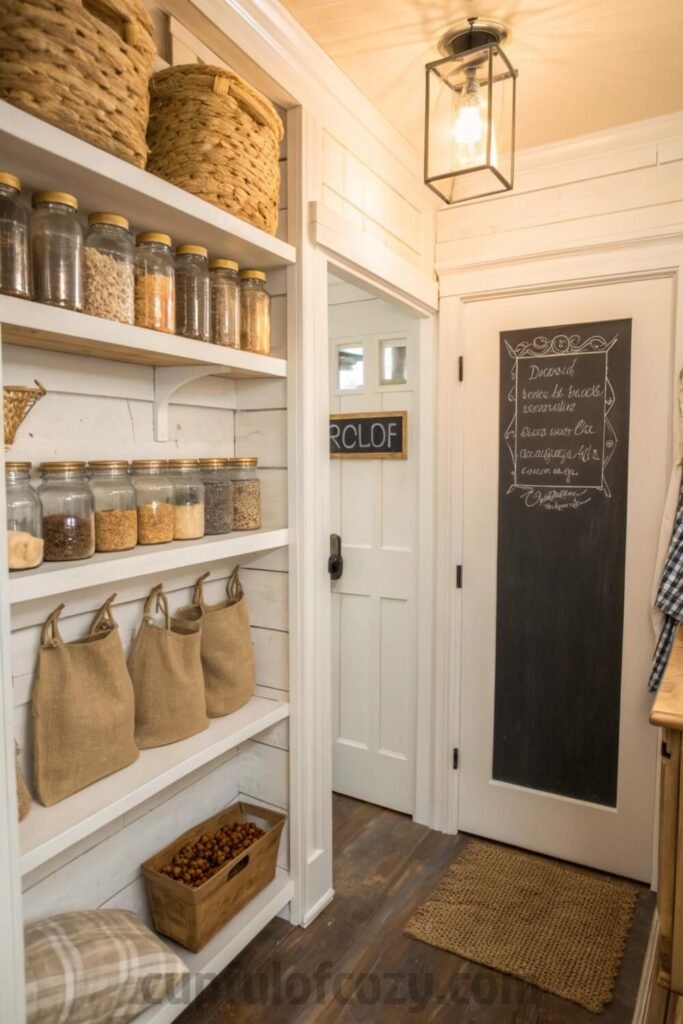
Organization becomes an art form at this stage. I grouped everything by category and size, which sounds obvious but makes such a huge difference. All the baking stuff lives together, all the oils and vinegars have their own section, and snacks get their own designated chaos zone.
Eye-level real estate goes to my daily essentials: olive oil, salt, the spices I actually use regularly (sorry, cardamom pods from 2019, you’re moving up high). Everything else gets organized by how often I reach for it, which has streamlined my cooking process more than I expected.
Clear containers changed everything for me. I can actually SEE how much pasta I have left instead of buying more and finding out I already had four boxes hiding behind the cereal. Labels might seem extra, but future you will thank present you when you’re trying to find something specific at 7 PM on a Tuesday.
Creative Touches That Make All the Difference

Lazy Susans are seriously underrated. I put one on a middle shelf for all my oils and vinegars, and now I can actually reach the fancy balsamic in the back without creating an avalanche of bottles.
A small whiteboard on the inside of the door became my command center. It’s perfect for grocery lists and meal planning notes, and I love being able to jot down “we’re out of coconut milk” right where I noticed it was missing.
Vertical dividers work wonders for things like cutting boards and baking sheets that want to flop over and create chaos. I got some from the Container Store and they’ve been total game-changers for keeping flat items actually upright and accessible.
Doing This Without Breaking the Bank
Look, you don’t need to spend a fortune to make this work. I got most of my shelving materials from Home Depot’s clearance section, and I repurposed some wooden crates I had lying around as storage bins. Sometimes the best solutions come from working with what you already have.
Those battery-operated LED lights I mentioned? Way cheaper than trying to run electrical work, and they provide plenty of light for what you need. I also found some great storage containers at the dollar store because not everything needs to come from fancy organization stores.
Even weird spaces can work for this concept. My friend converted the space under her stairs into a pantry and it’s better organized than most people’s actual kitchens. Another friend used a bedroom closet in her studio apartment and it completely transformed how she approaches cooking and meal prep.
How This Actually Changed Everything
I’m not gonna lie, this little project completely shifted how I think about my space and my cooking. Having everything organized and visible means I actually use ingredients instead of letting them expire in the back of some forgotten cabinet. I meal plan better, I waste less food, and cooking feels more intentional now.
There’s something so satisfying about opening that pantry door and seeing everything in its place. It’s become this little moment of calm in the middle of dinner prep chaos. My friend came over last week and spent ten minutes just staring into my pantry, asking how I organized everything.
The whole project took me a weekend to complete, and every time I open that door I’m reminded that sometimes the best solutions are right there waiting for you to notice them. That random closet turned out to be the MVP of my kitchen situation.
If you’re thinking about trying this, just go for it. Worst case scenario, you end up with a really organized coat closet. But I’m betting you’ll love it as much as I do, and your future self will definitely thank you when you can actually find the paprika without excavating your entire spice cabinet. Sometimes the simplest changes make the biggest difference.
- Before buying anything online, check Rakuten (formerly Ebates) — either with the browser extension or directly on Rakuten.com. Just type in your store, click the current deal, and shop as usual. Every purchase earns you cashback that can be mailed to you or sent via PayPal. In today’s economy, even a few dollars back can turn into a Starbucks latte, McDonald’s fries for the kids, or a little treat you don’t have to budget for. If you’ve never used Rakuten before, you’re missing out on free money — and right now, you’ll even get a $30 bonus when you spend your first $30. Click here to sign up and stop letting your online orders steal from you. Click here to sign up and save money!
*Disclosure: This post includes affiliate links. I may earn a small commission if you join Rakuten through my link — but it doesn’t cost you anything extra. In fact, you’ll actually save more!